(Getting to) the Editors Page
This chapter contains some information on getting to the main editing page, and an overview of everything that is on there.
Here are the steps for getting to the main page:
Here is the overview of the editing page:
Logging In
To login we need to direct to the following page: https://github.com/coastalwhite/reevesdotnl
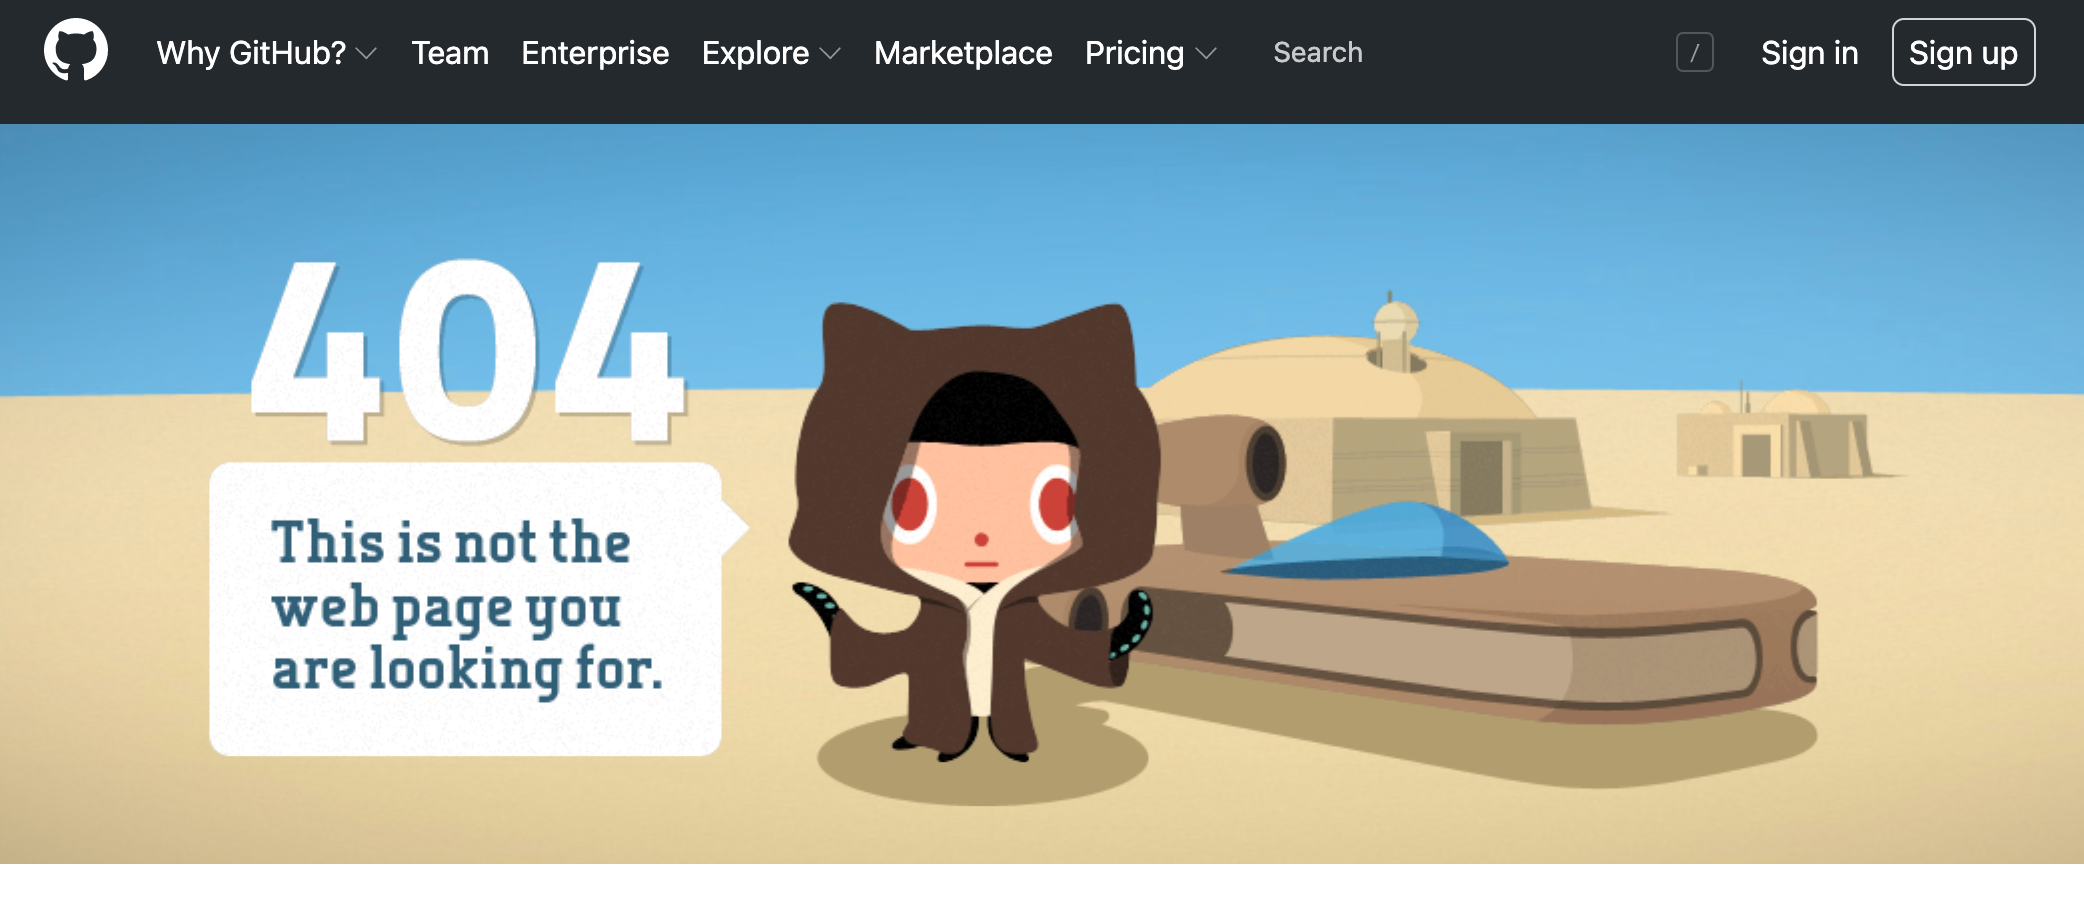
If you are logged in you can go to the Main Page Overview. If you aren't logged in yet, this page will look something like and don't be scared you are on the wrong page:
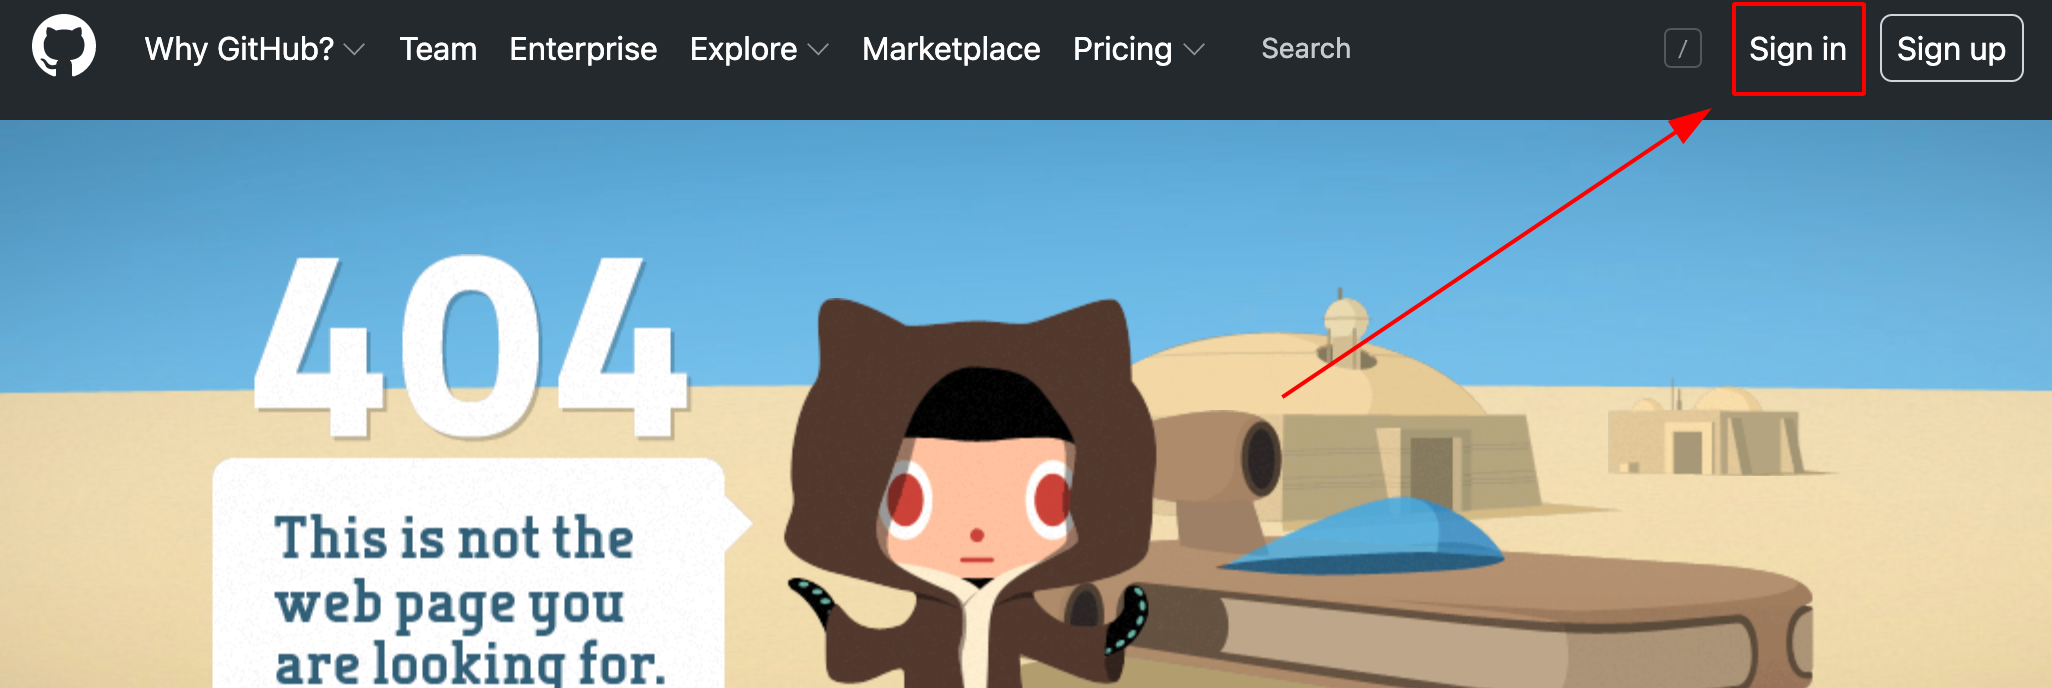
From this page, you should click the Sign In button, which is highlighted in
the following image:
This should lead us to a form which looks something like this:
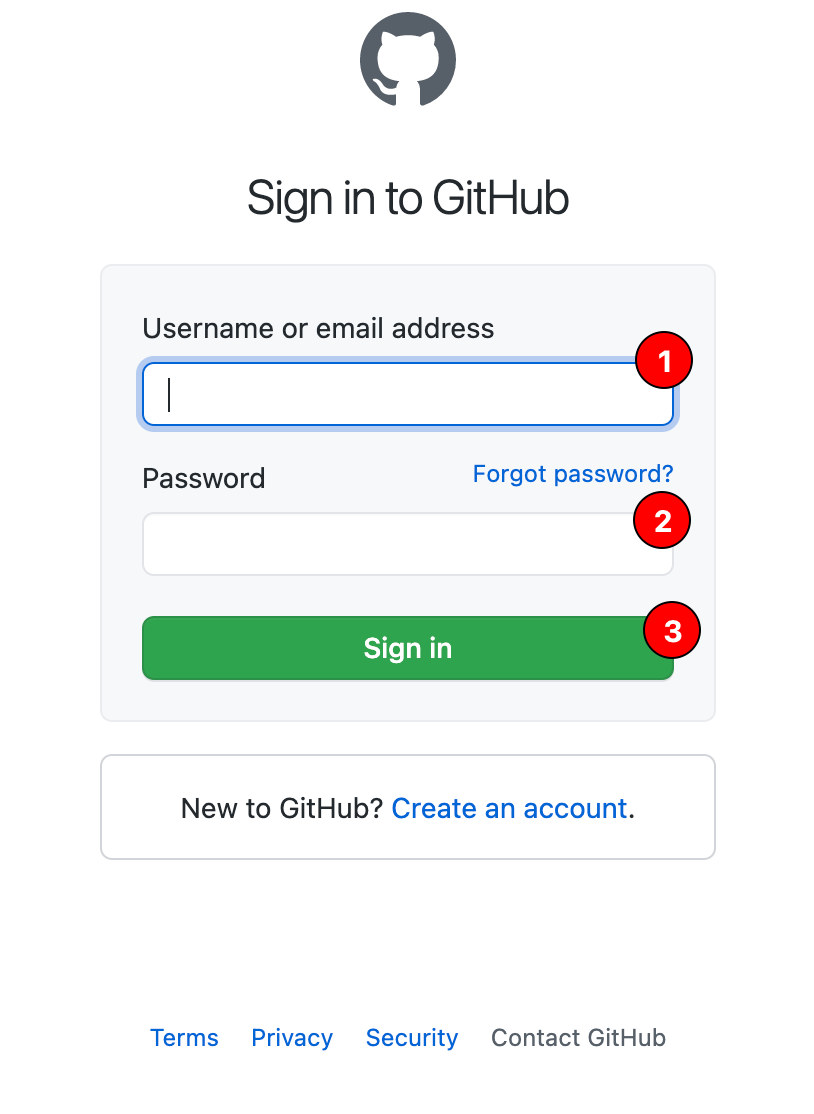
Then we follow the following steps:
- Add the username "reevesdotnl" into the
Usernamebox (Label 1 in the figure). - Add the password given to you into the
Passwordbox (Label 2 in the figure). - Click the login button (Label 3 in the figure).
Depending on whether it is our first time logging in we may then get the from telling us to verify our new sign in with our email account. This can be done by navigating to your email and transfering the number send to you to the given input box in the form and clicking the submit button.
If the account's email isn't transferred to you by the time you are reading this, I most definitely forgot and you should ask. Whoops
If everything went well, you should be on the following page:
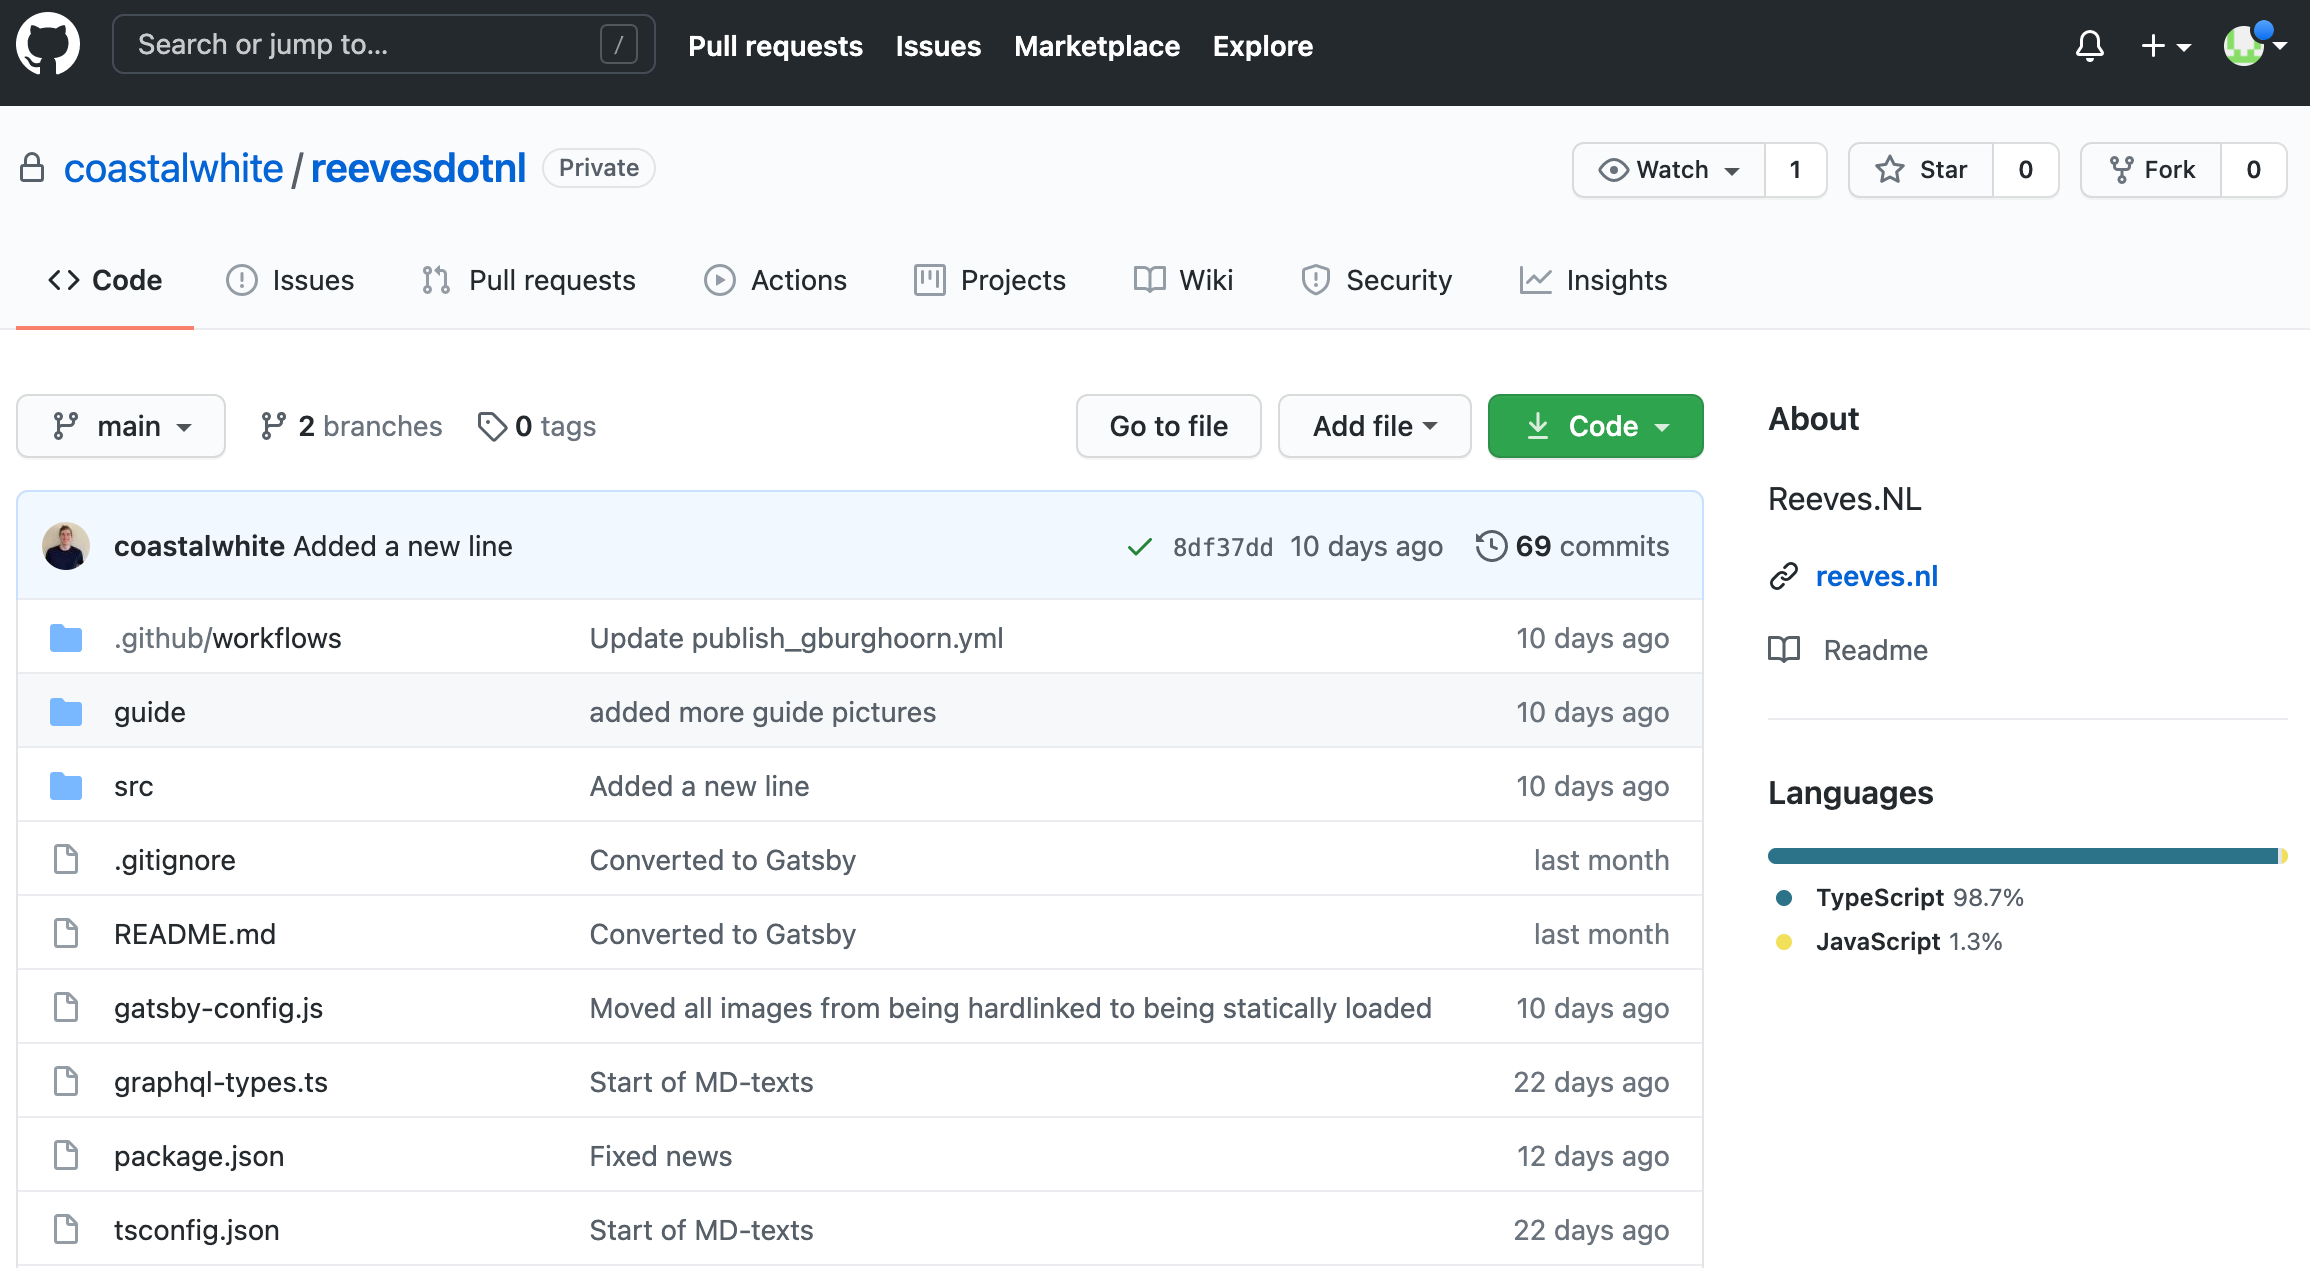
You should now be ready to get to the Overview of the Main Page.
Navigating back to the main page
If we are lost and we want to get back to the main page (illustrated above). There are two ways to do so: the fast way and the reliable way.
Fast way
If you can see the following in the upperleft corner of the webpage:
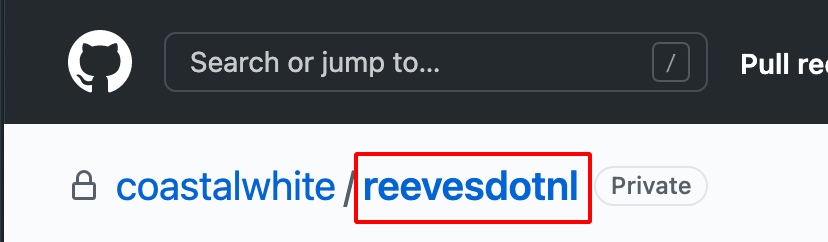
Then you can click on the reevesdotnl highlighted with red in the figure. This
should take you to the main page.
Reliable way
If you cannot see the reevesdotnl link in the upperleft corner of the webpage.
The easiest way is to go the webpage
https://github.com/coastalwhite/reevesdotnl. Which when you are Logged
in should take you to the main page.
If we are on the main page, we can have an Overview of everything to do there.
The Home Page
In the figure below is a image of the main page, with everything important labeled on it. All of these label and what to do with them is explained below.
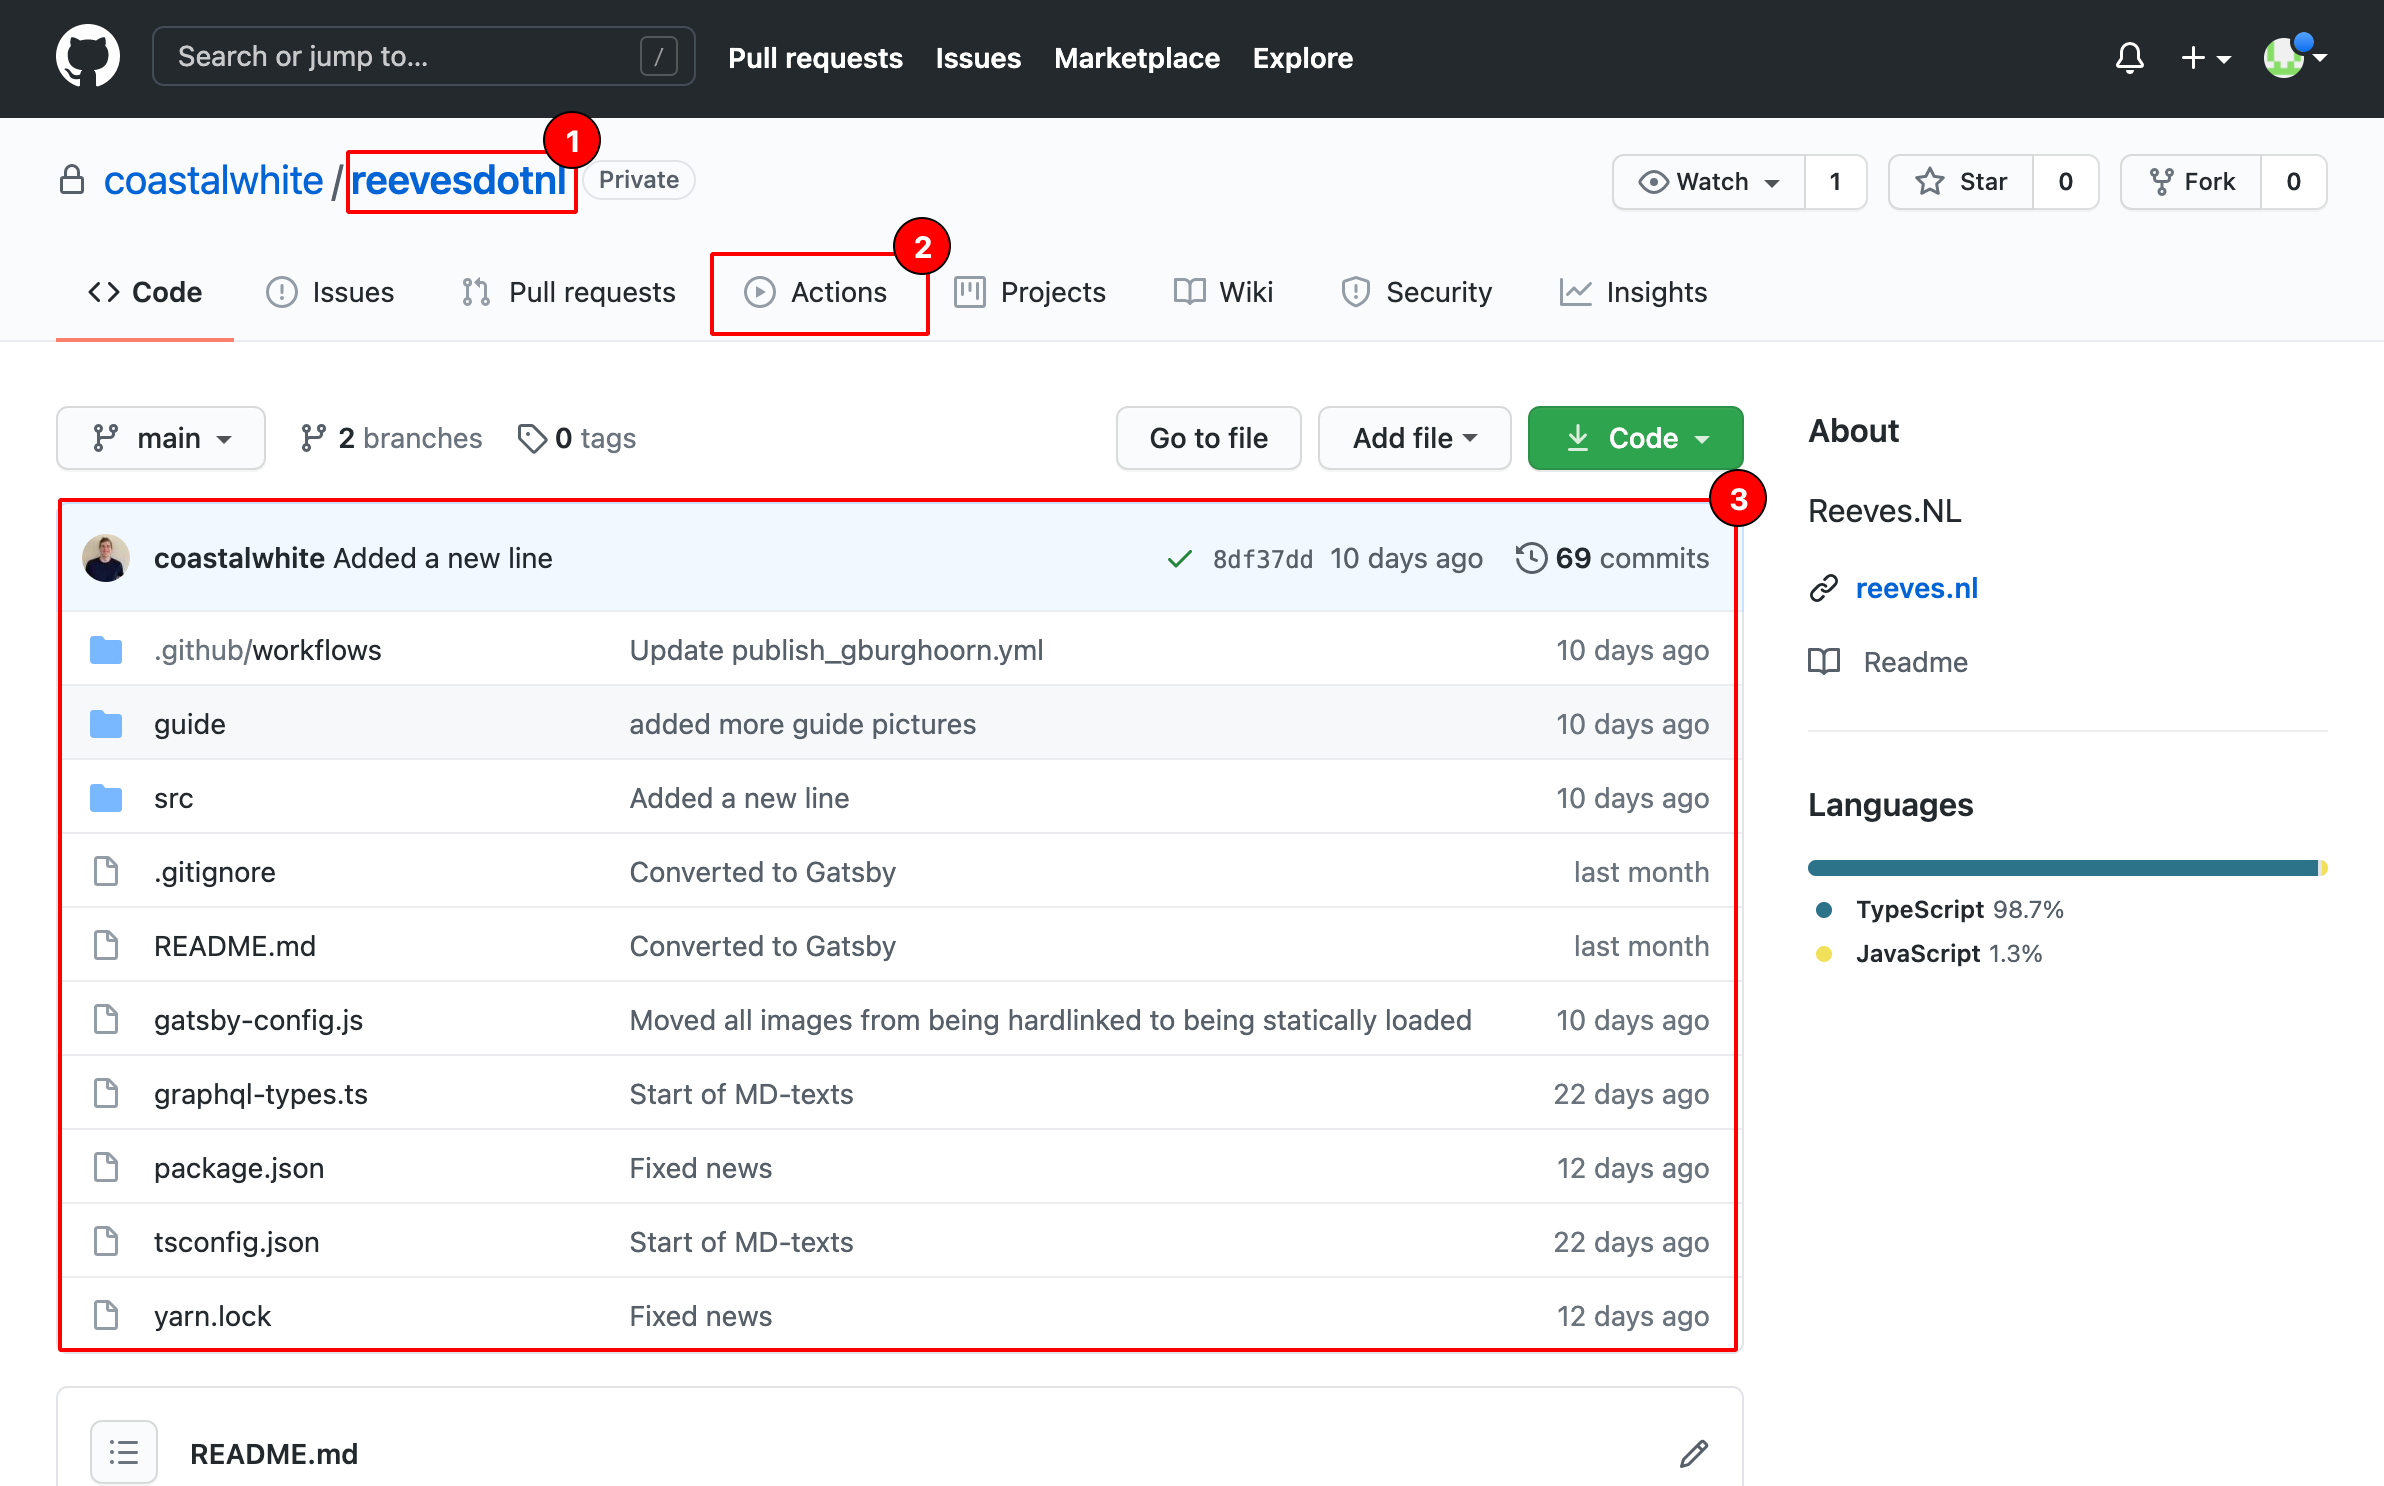
- The link which always redirects to this page. Important if you want to come back to this page later on.
- The button is very important for all the publishing actions, which are: Creating the Demo Page and Publishing to Reeves.NL.
- Most of the editing will start here. It is basically a file/folder structure. More about it can be read here: File Structure.
General Editing Info
Here will be some general information on editing, including the formatting (Markdown) guide, a guide on the File Structure, a guide on how to add images and guide on how to add pdf's.
File structure
Whilst the File Structure is not really important it can be important to link back to when you want to adjust something. So let us go through the important structure elements and leave out the really unimportant things. Here I will mark something on a scale:
- 0: You are never going to need to adjust
- 1: You should leave alone but I will describe it just in case
- 2: These are things you will need to work with for some workflows.
- 3: Almost all workflows interact with these files.
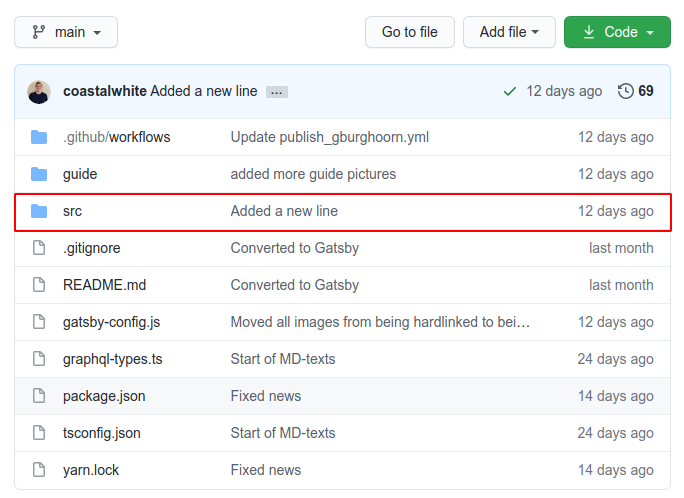
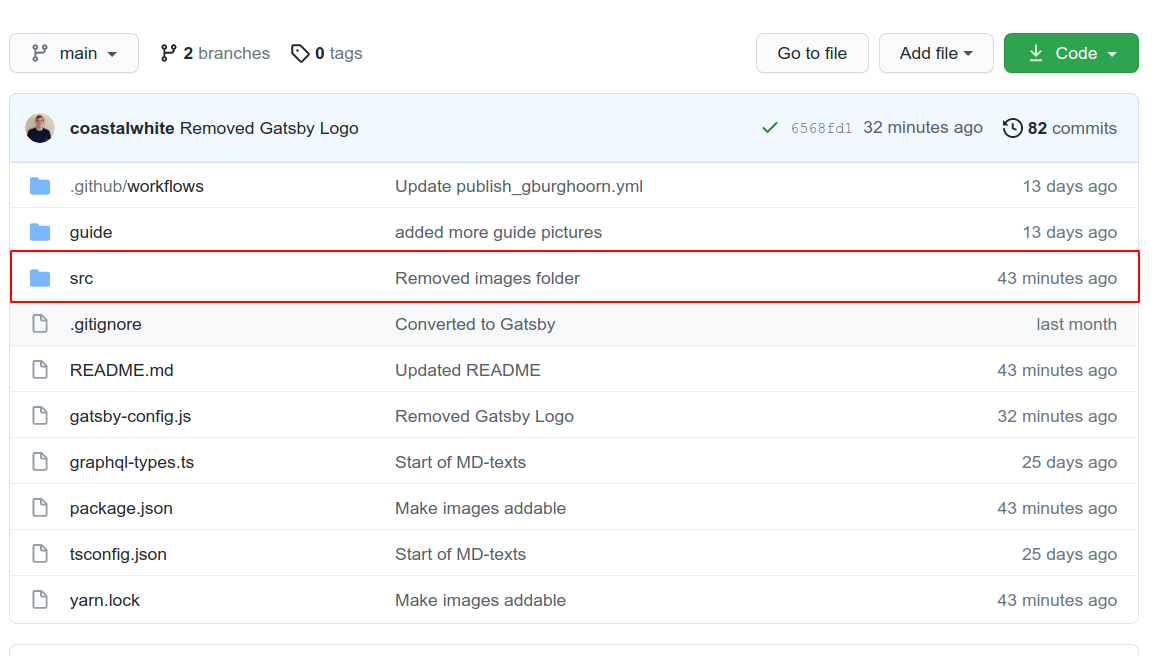
At the main level, we have a couple of files and folders:
.github/workflows: 1: This contains how to publish filessrc: 3: This contains all the files which are the source to the entire website..gitignore: 0README.md: 0gatsby-config.js: 0graphql-types.ts: 0package.json: 0tsconfig.json: 0yarn.lock: 0
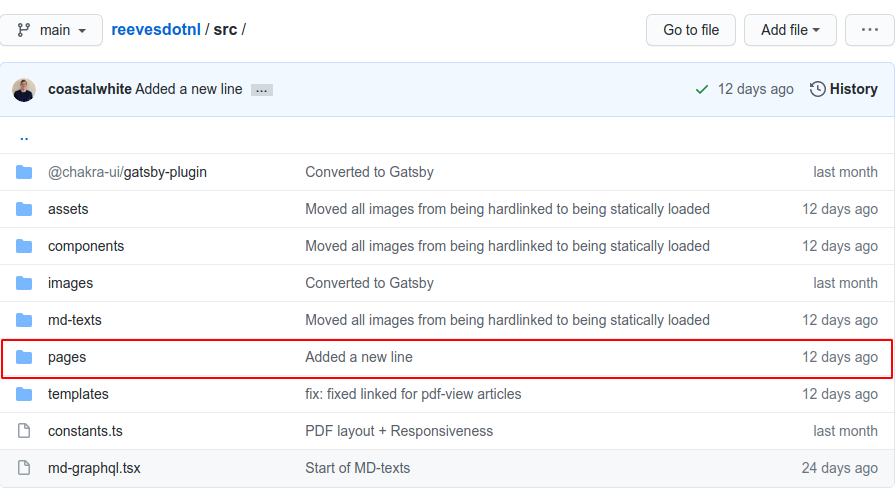
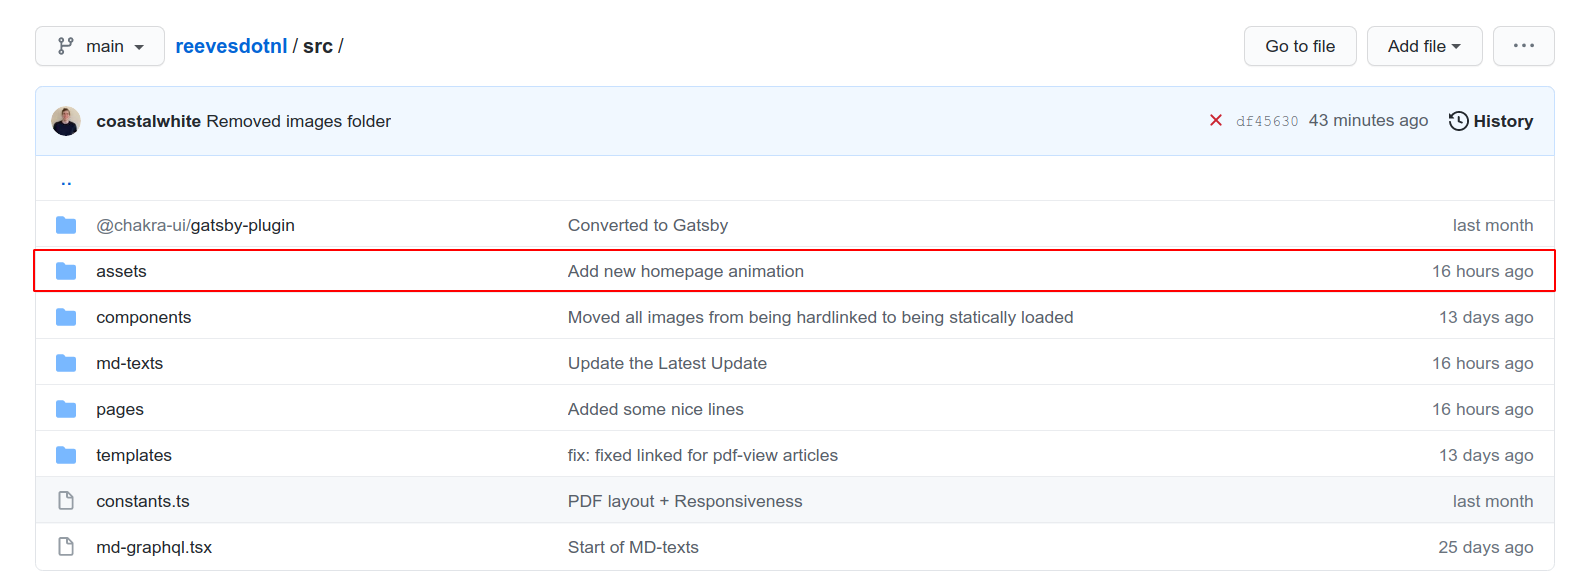
In the src folder we have:
@chakra-ui/gatsby-plugin: 0assets: 2, This contains most of the static images for the webpage e.g. the homepage animation, the logo.components: 1, The smaller components on webpages, e.g. the layout of pagesimages: 2, the folder containing the images for articles and dynamic pagesmd-texts: 2, contains the text for static pages e.g. the small about on the main page.pages: 3, here are all the pages (dynamic and static) including news articles and other pages.templates, 1: Contains the PDF view templateconstants.ts, 0md-graphql.tsx, 0
Markdown Guide
Here is a summary video, below is the text version.
THIS IS A SUMMARY OF EVERYTHING YOU CAN DO. FOR SOME OTHER DOCUMENTATION REFER TO HERE
Table of contents
Example
This would equate to:
Text Styling
Bold
In order to write Bold Text, there are two ways.
The following two methods are equivalent:
This is **Bold Text**, but this is also __Bold Text__.
This will show as:
This is Bold Text, but this is also Bold Text.
Italic
In order to write Italic Text, there are two ways.
The following two methods are equivalent:
This is *Italic Text*, but this is also _Italic Text_.
This will show as:
This is Italic Text, but this is also Italic Text.
Note: If we want to type a * or a _, but we don't want things to become italic, we can 'escape it' by prefixing a \ in front of
it. This will turn This is not \*Italic Text\* into This is not *Italic Text*
Links
The best to create links:
[Text used for the link](http://www.example.com) will create Text used for the link.
Linking to a .mdx file
When you want to link to a newly created page or to a already existing page in
from page in the same level-2, you can forget about the .mdx extension at the
end of the file. So if you create a new file a-suitable-title.mdx in the
gondwana folder, and you want to link to it from within the page within gondwana
folder. You would add:
[Text used for the link](../a-suitable-title)
If you want to link to a file from a different level-2 category. So for example
you want to link to the 'About Earthworks' page from a news article, there is a
small caveat. You would use ../level-2-slug/page-name. The ../ here meaning
to go back one folder, followed by the level-2-slug with which we select which
level-2 to link to. So in our the example case of linking to the 'About
Earthworks' page from a news article we would use:
[Text used for the link](../../about/earthworks)
All the level-2 slugs are just the titles of the level-2 pages in full lowercase, so "Gondwana" becomes "gondwana", etc.
Headers
You can add headers by creating a new line of text and adding # or ## in front of it.
# being bigger then ##.
Example:
# Example header will turn into
Example header
and ## Example smaller header will turn into
Example smaller header
Notes
In order to add notes, we can prepend the > in front of the lines we want to be notes.
e.g.
This is not a note
> But this is a note
> and another line
will turn into
This is not a note
But this is a note
PublishDate
In order to automatically add and format the publish date defined in the metadata, we can add a
<PublishDate />.
If the page file is
---
date: "1900-01-02"
title: "Example title"
---

<PublishDate />
we will get
1900 January 2
Updated on
We add a <PublishDate updated="2000-03-04" /> to change it to 1900 January 2 (updated on 2000 March 4)
No specific Day
We add a <PublishDate noday /> to change it to 1900 January
Prepend some text
We add a <PublishDate preprend="Delft, " /> to change it to Delft, 1900 January 2
Append some text
We add a <PublishDate append="!" /> to change it to 1900 January 2!
NOTE: All these options can be combinated as such:
<PublishDate updated="2000-03-04" noday prepend="Delft, " />
Adding Images
In order to add images we can just add a link with a ! before it. For example
to add a image with the link
https://www.google.com/logo.png
we would add:

here Google Logo is a text description of the image.
This would create:

Adding Images/Animations
Here is a video on how to do it, below is a text-based explanation:
To add images or animations, there are 4 steps we are going to undertake:
- Navigating towards the
assetsfolder. - Uploading our images/animations.
- Verifying the uploaded files
- Adding the images/animations to the article.
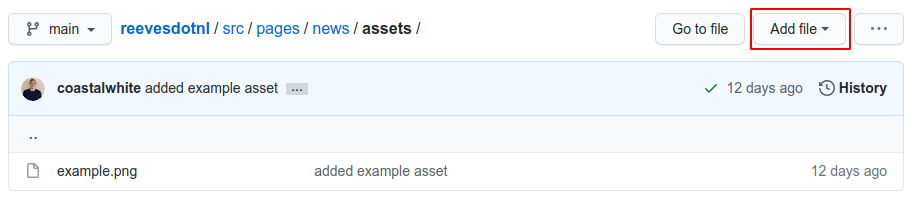
Navigating towards the assets folder
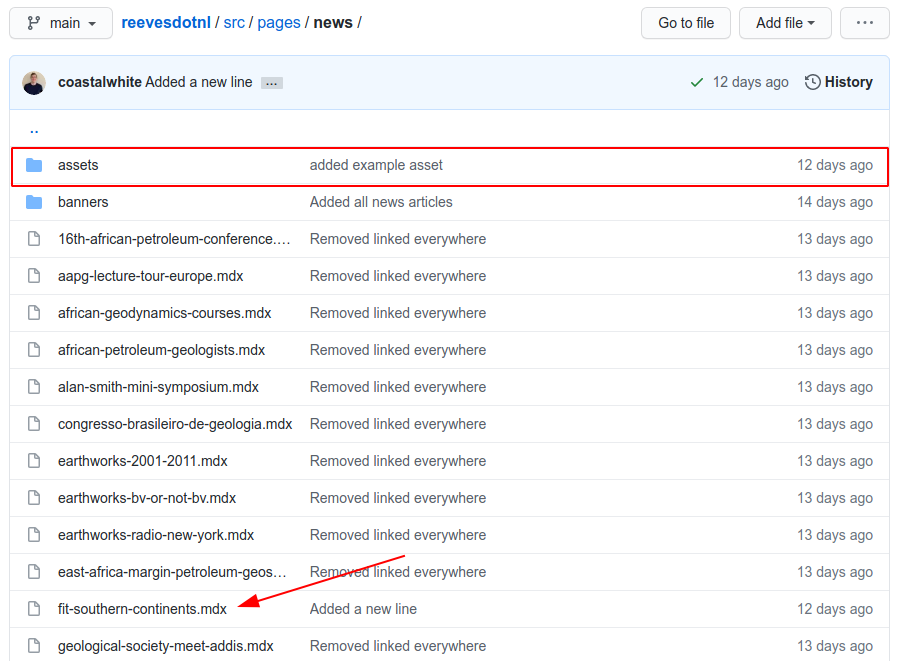
We need to first direct to the article we would like to add an image to. This is
going to start at the main page. This example
will adjust the news/fit-southern-continents article, but this could be done
for most Level 3/4 articles.
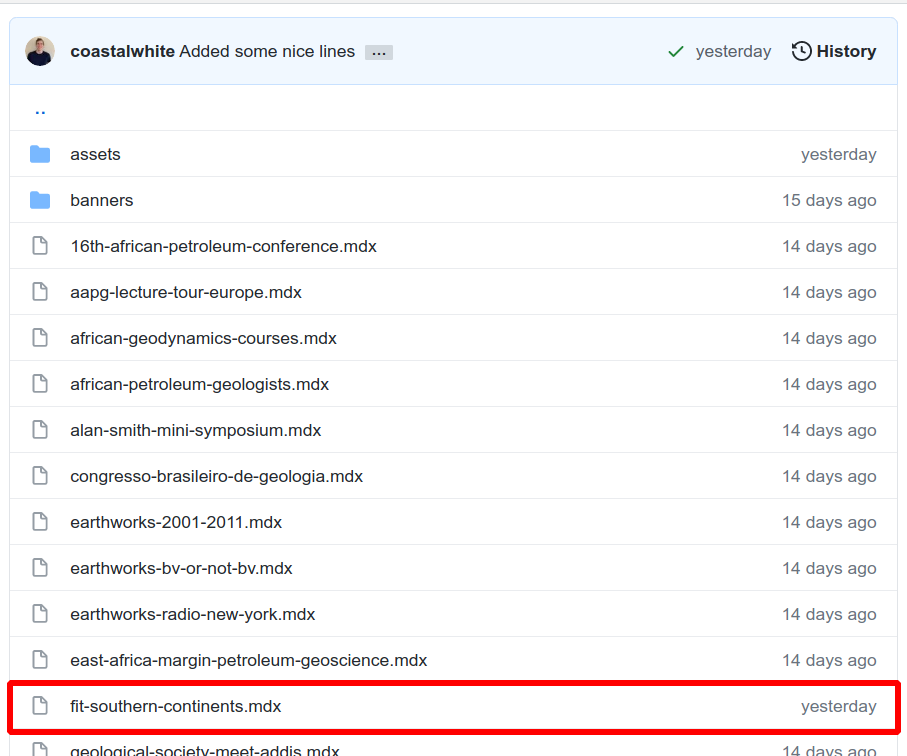
From the main page, we can use to the file explorer to navigate towards the article. In the following images the (red) highlighted link is clicked.
Now the file fit-southern-continents.mdx is visible, thus we search for the
assets folder and go into it.
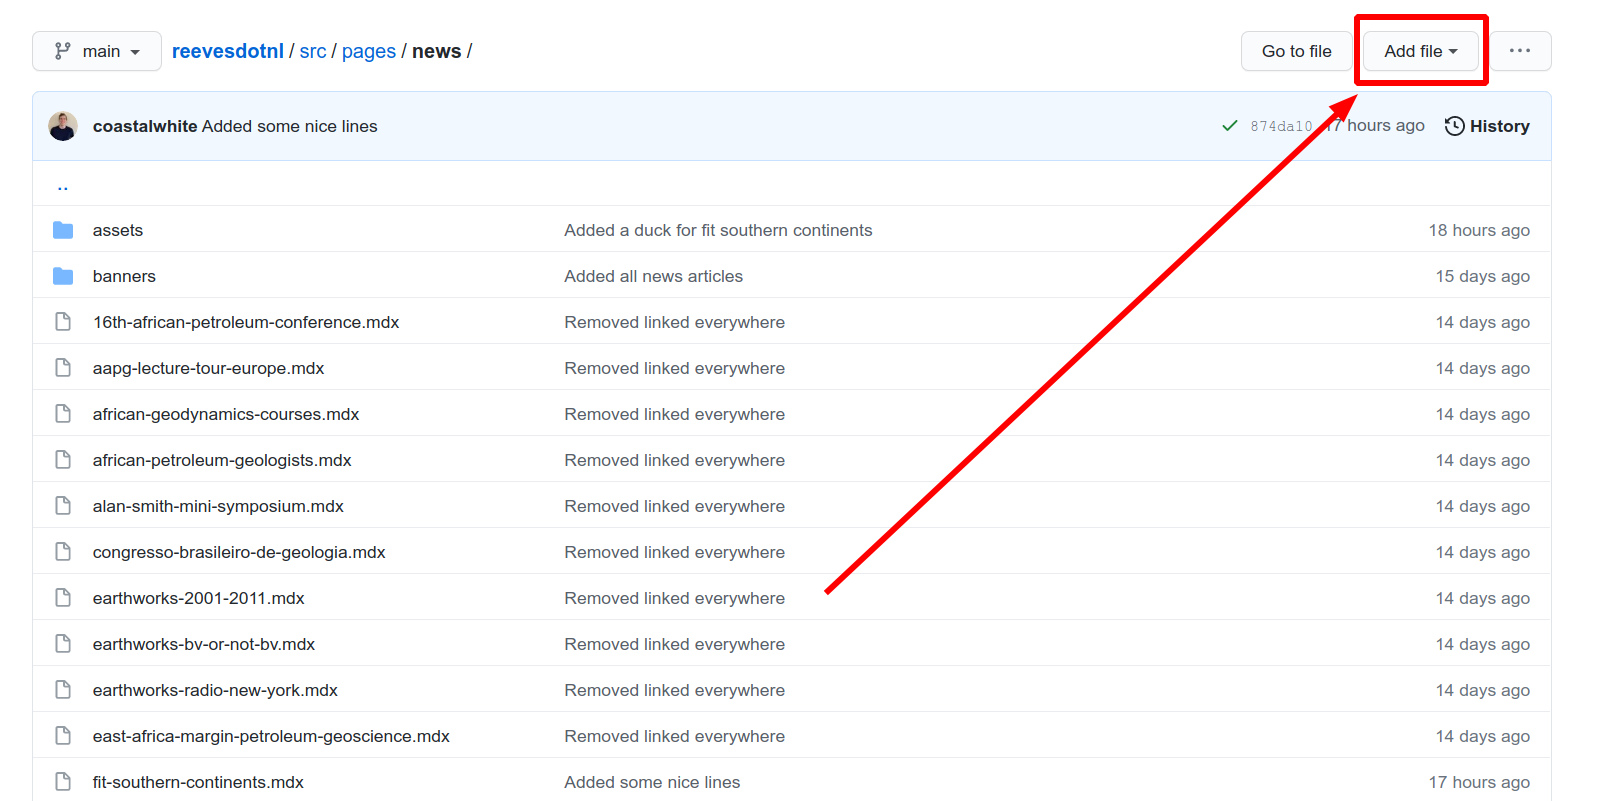
Uploading our images/animations
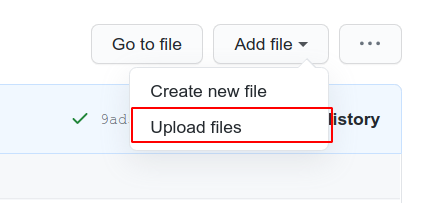
Now we are going to upload our images/animations. We click the Add file
button (shown in the following figure).
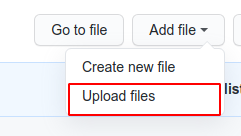
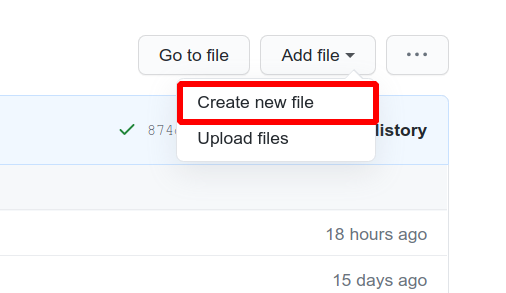
A small menu will pop up and we will click the Upload files button.
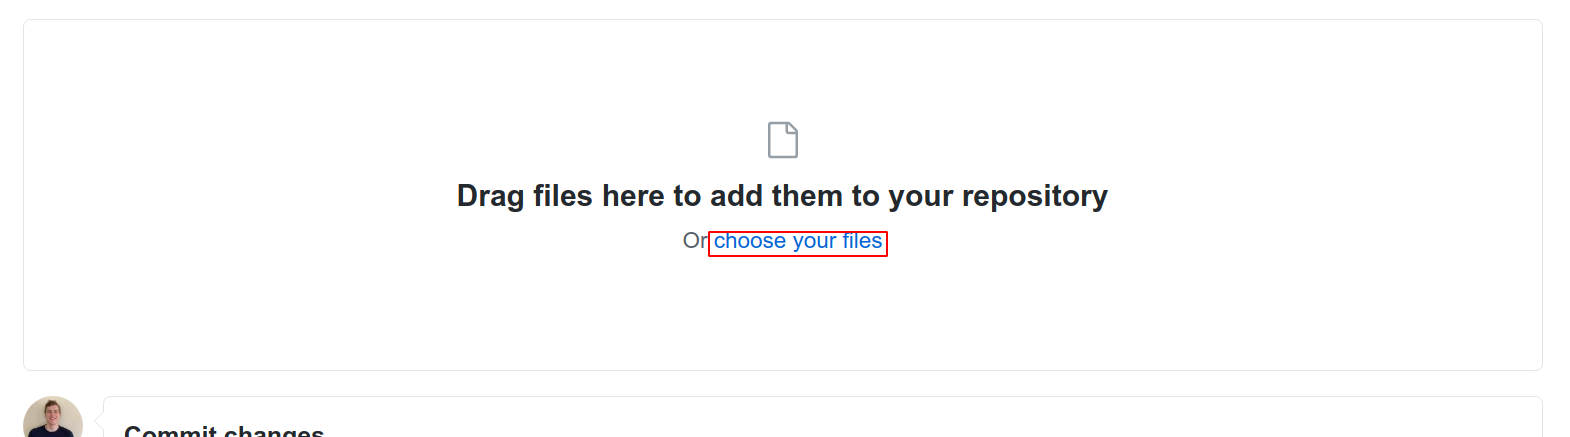
A new page will show up where we can click the choose your files. This will
open a file explorer where you can direct it towards the images/animations you
would like to upload. Alternatively, you could drag the files from the source
into this box, which should also add them.
All uploaded images will appear under the box (as can be seen below).
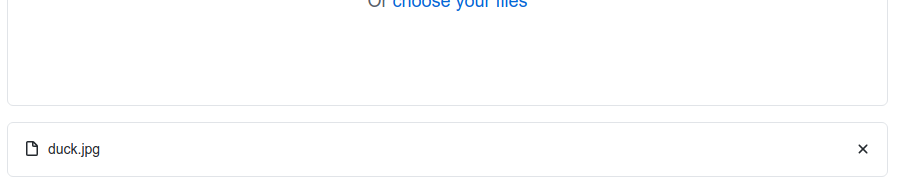
When we have added all the images we would like to upload we can move onto the next step.
Verifying the uploaded files
If we have added all the images we want to add we can scroll down the page to see the following box.
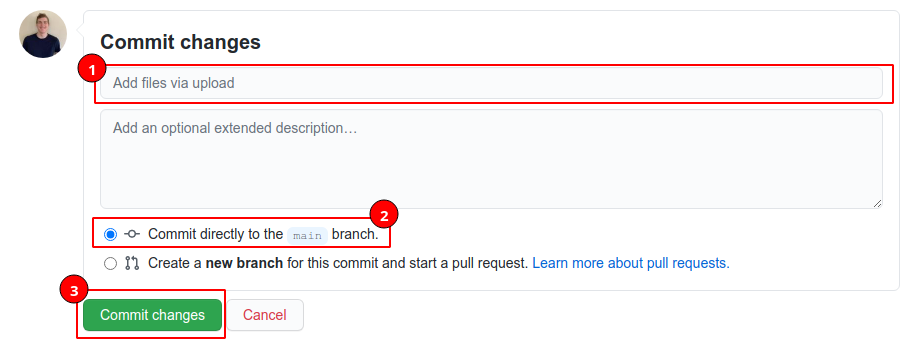
In 1 we want to add a description of what we just added. I just added a duck
picture so I would write something like Added duck picture for fit-southern-continents. This is not very important, but in the long run will
help with keeping track of what you did.
We want to make sure 2 is checked.
After 1 and 2 are done, we can click the Commit Changes button.
Adding the images/animations to the article
Follow the guides on how to add different the different kinds of articles:
Now between your paragraphs you can add something as such:
rest of article...

rest of article...
With the rest of article... being the surrounding text of the article. The
duck.jpg being the filename of the uploaded image/animation.
Adding PDFs
The process of how to add a PDF to a article is almost equivalent of adding
picture. This guide is mostly copied from the Adding
images/animations article with a few small adjustments namely
using [link title](./assets/file.pdf) instead of
 in our articles. A video on the process for
images in the Adding images/animations guide
To add pdf, there are 4 steps we are going to undertake:
- Navigating towards the
assetsfolder. - Uploading our pdfs.
- Verifying the uploaded files
- Adding the pdfs to the article.
Navigating towards the assets folder
We need to first direct to the article we would like to add an image to. This is
going to start at the main page. This example
will adjust the news/fit-southern-continents article, but this could be done
for most Level 3/4 articles.
From the main page, we can use to the file explorer to navigate towards the article. In the following images the (red) highlighted link is clicked.
Now the file fit-southern-continents.mdx is visible, thus we search for the
assets folder and go into it.
Uploading our pdfs
Now we are going to upload our pdfs. We click the Add file
button (shown in the following figure).
A small menu will pop up and we will click the Upload files button.
A new page will show up where we can click the choose your files. This will
open a file explorer where you can direct it towards the pdfs you
would like to upload. Alternatively, you could drag the files from the source
into this box, which should also add them.
All uploaded files will appear under the box (as can be seen below).
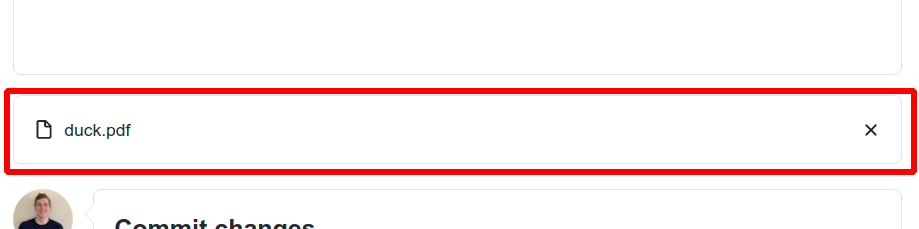
When we have added all the pdfs we would like to upload we can move onto the next step.
Verifying the uploaded files
If we have added all the images we want to add we can scroll down the page to see the following box.
In 1 we want to add a description of what we just added. I just added a pdf
containing a duck so I would write something like Added duck pdf for fit-southern-continents. This is not very important, but in the long run will
help with keeping track of what you did.
We want to make sure 2 is checked.
After 1 and 2 are done, we can click the Commit Changes button.
Adding the images/animations to the article
Follow the guides on how to add different the different kinds of articles:
Now between your paragraphs you can add something as such:
rest of article...

[Beautiful duck pdf](./assets/duck.pdf)

rest of article...
With the rest of article... being the surrounding text of the article. The
duck.pdf being the filename of the uploaded pdf.
Publishing workflow
Creating the Demo page
Here is a video on how to do it, below is a text-based explanation:
An demo page is automatically created after every Commit Changes action. The
Commit Changes is part of every adjusting or adding action. This will be
pushed to the https://coastalwhite.github.io/reevesdotnl/ page. This may take
a few (~5) minutes to kick into effect.
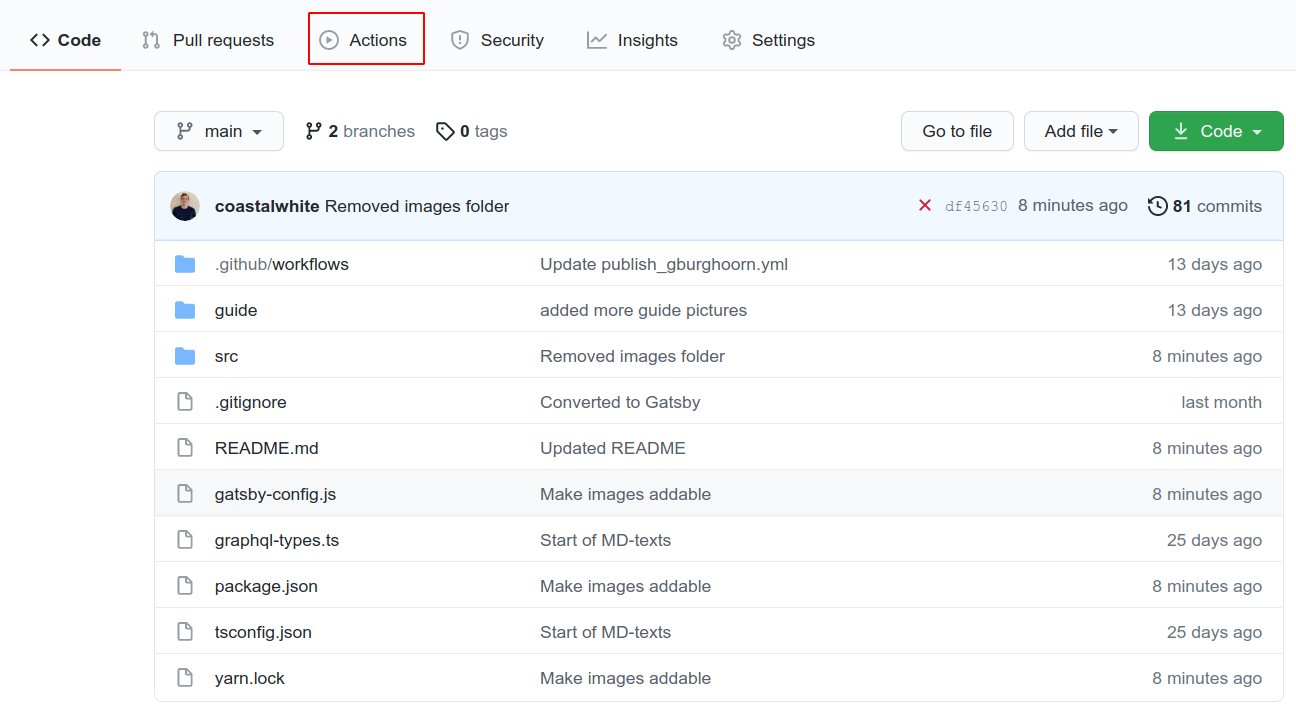
To view the status of the building of the demo you can look under the Actions
tab.
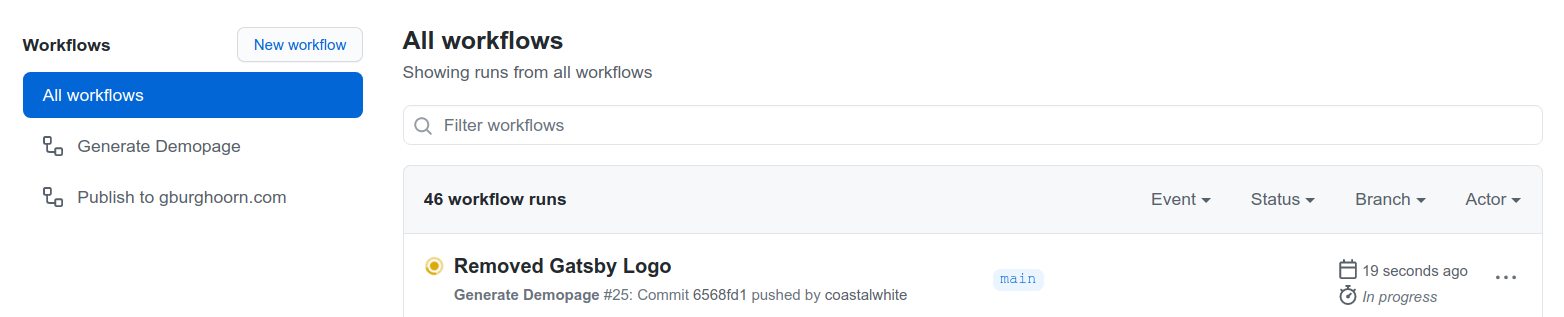
Then after committing some changes we will see, this busy:
After around 3 minutes this will turn into this:

Now after around 2 minutes the changes should show up on the demo page at: https://coastalwhite.github.io/reevesdotnl/
Publishing to Reeves.NL
Here is a video on how to do it, below is a text-based explanation:
and after a two minute wait.
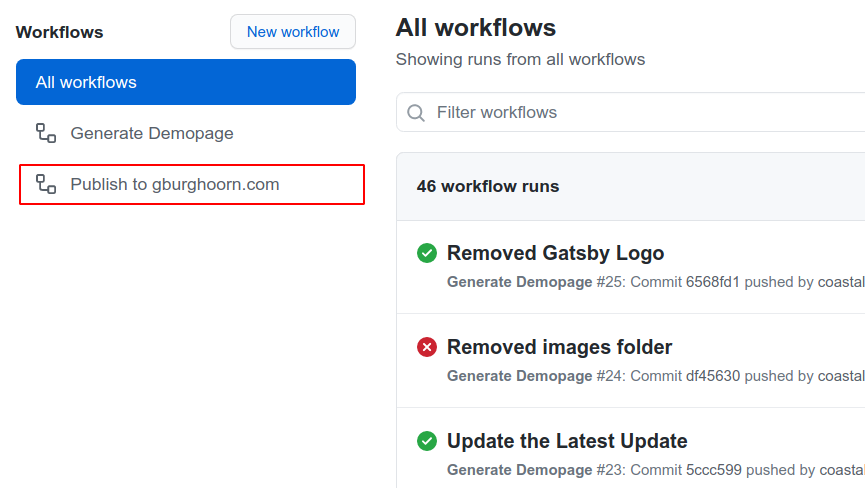
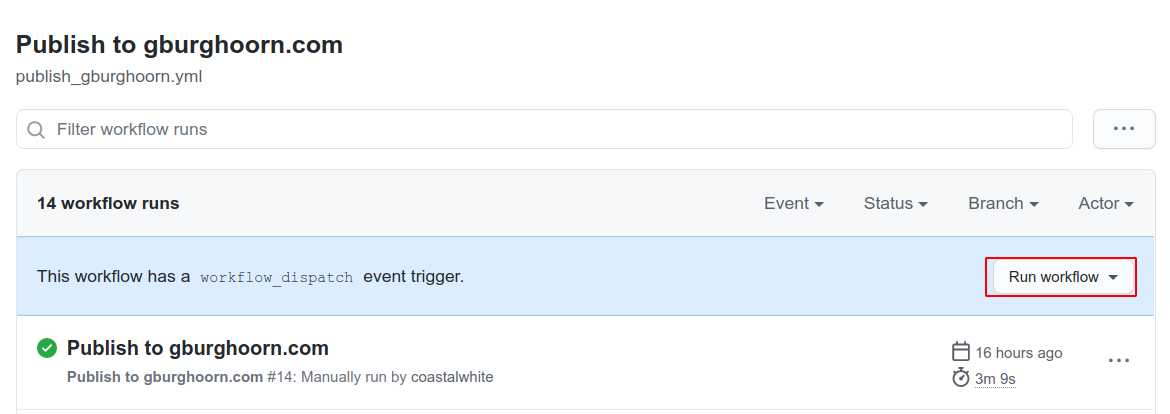
In order to publish to the reeves.nl website, we can need to direct to the
Actions tab from the main page.
Here we can direct our attention to the Publish to reeves.nl button. Notice
that in the demo it says Publish to gburghoorn.com. This is because we haven't
linked it to your site yet, it will be after release.
After clicking the Publish to reeves.nl button there will be a Run workflow.
This will open a dropdown menu, where make sure it is set to Branch: main
(1) and then we click the green Run workflow (2) button.
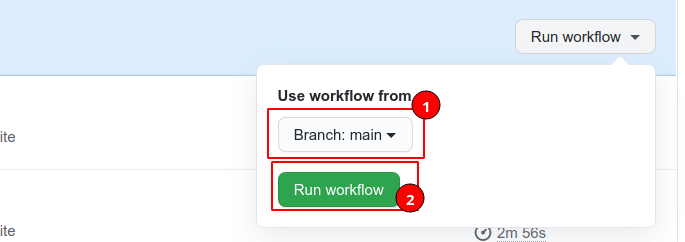
After a few seconds, a status will appear which will indicate that the publishing is underway.

After about 2 minutes, the status will change to done (indicated by a green checkmark) and our changes should be done and reflected on the website.

Editing the homepage
Adjusting main animation
Here is a video on how to do it, below is a text-based explanation:
In order to update the main page animation we would:
- Delete the old
homepage.gifin thesrc/assets/imgfolder. - Upload a new
homepage.gifinto thesrc/assets/imgfolder.
Deleting the old animation
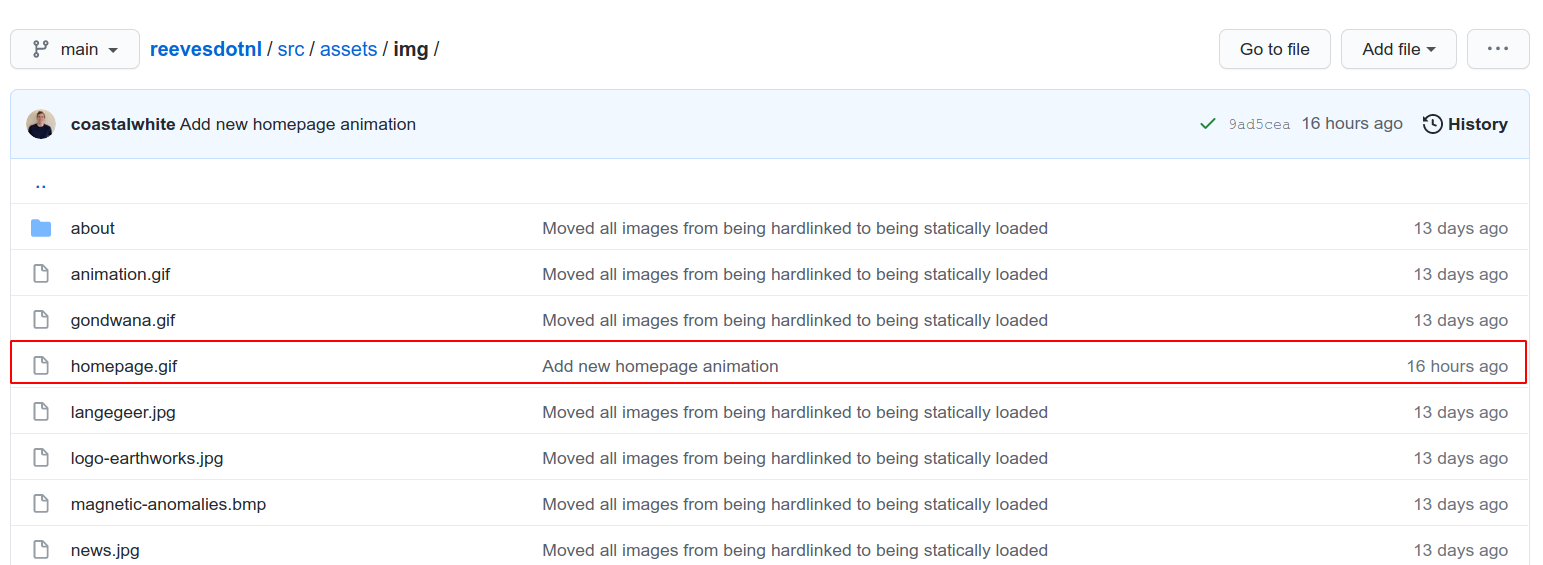
In order to delete the old homepage.gif, we would go the main
page. Direct into the src/assets/img folder.

Then we direct towards to the homepage.gif file.
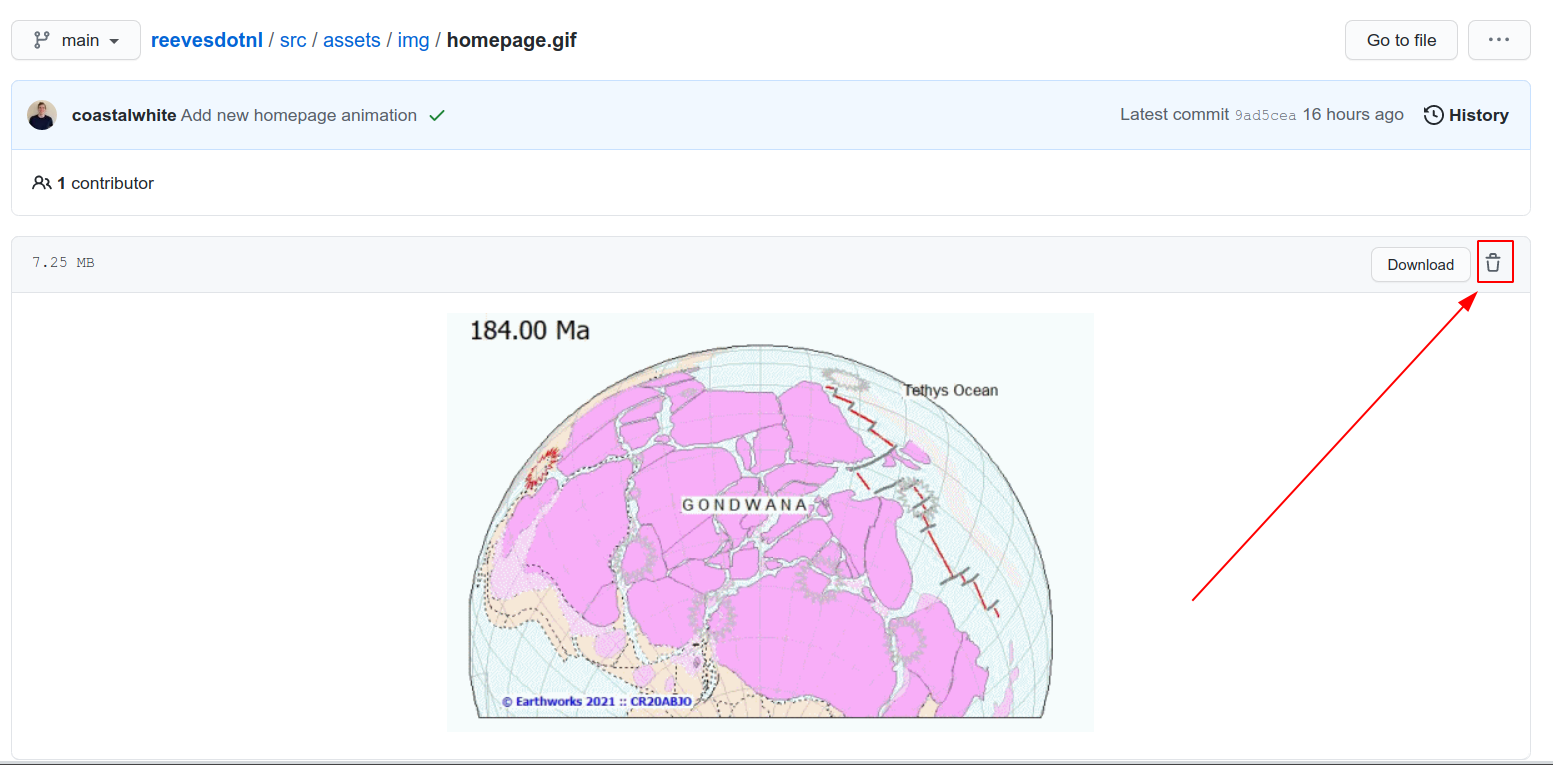
We click the delete icon in the upper right corner.
We will be redirected to a page where we can fill out the following form.
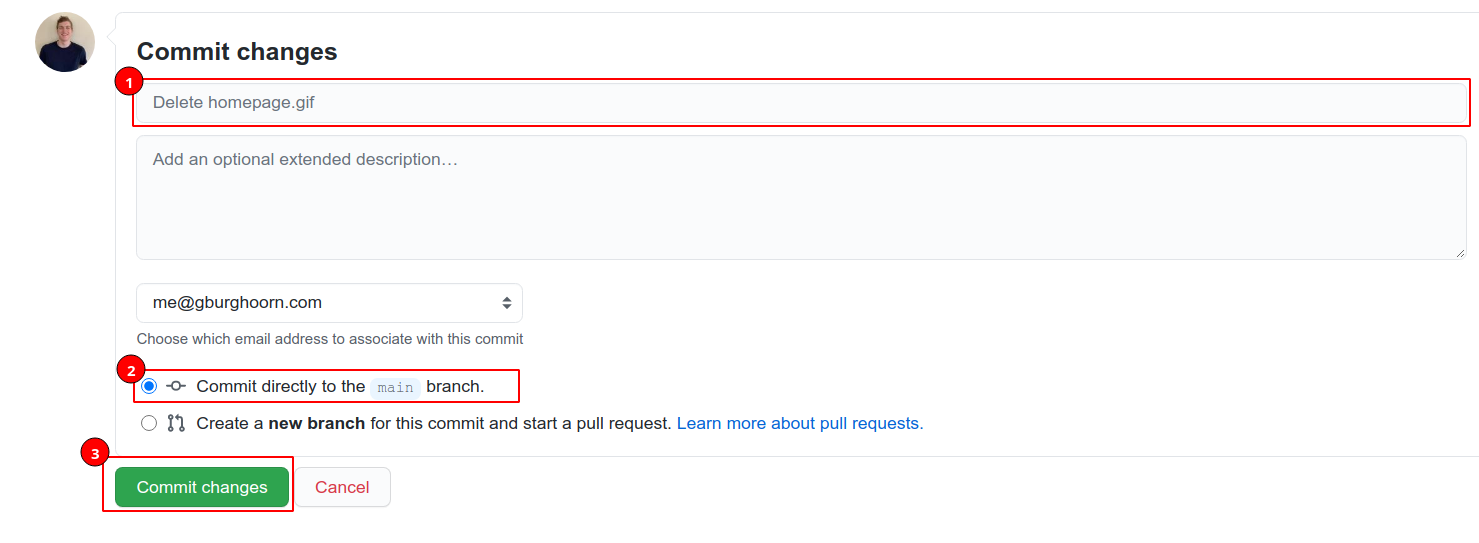
- Enter an appropriate title e.g.
Delete homepage animation - Make sure the
Commit directly to the main branchis checked. - Click the
Commit Changesbutton.
Now the old animation is deleted.
Uploading a new animation
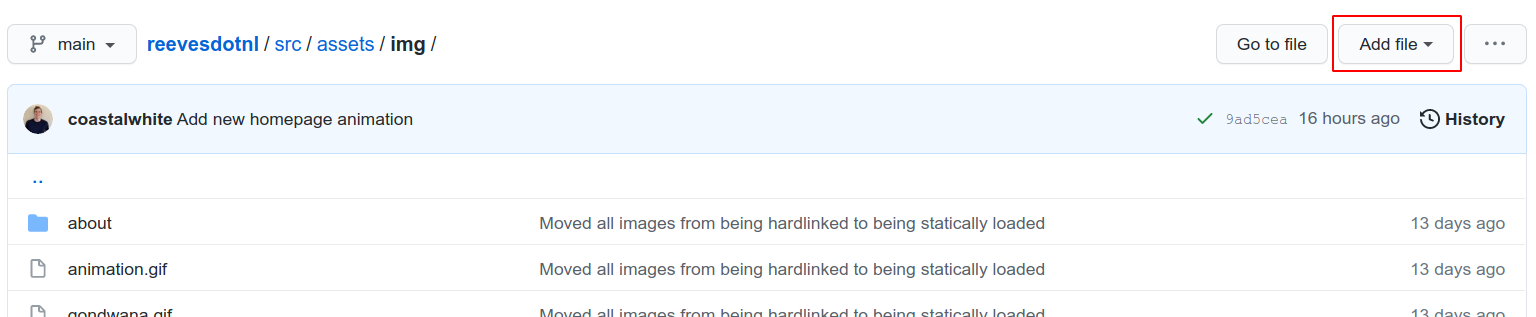
In order to upload a new animation we again go to the src/assets/img folder.
Now we are going to click Add File. This will open a dropdown menu in which we
are going to click Upload Files.
This will open a new page, where we can click the choose your files link to
open the file explorer and upload a homepage.gif.
IMPORTANT NOTE: make sure the file is actually called homepage.gif otherwise
it will not work
Then we again come to the Commit Changes section.
- Enter an appropriate title e.g.
New homepage animation - Make sure the
Commit directly to the main branchis checked. - Click the
Commit Changesbutton.
Note: The demo page may take a while to properly update after this. It may first fail to load the animation. After around 10 minutes this should be fixed however.
Adjusting small about
In order to update the small about. We need to direct towards the src/md-texts
folder.
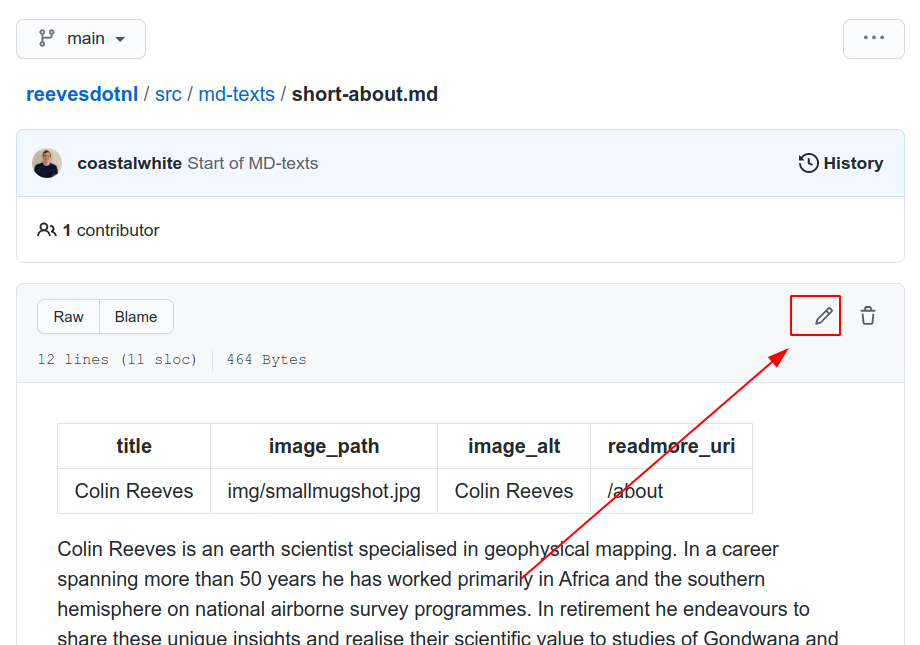
Here we will see the short-about.md file. Open that file.
Then we click the edit icon in the upperright corner.
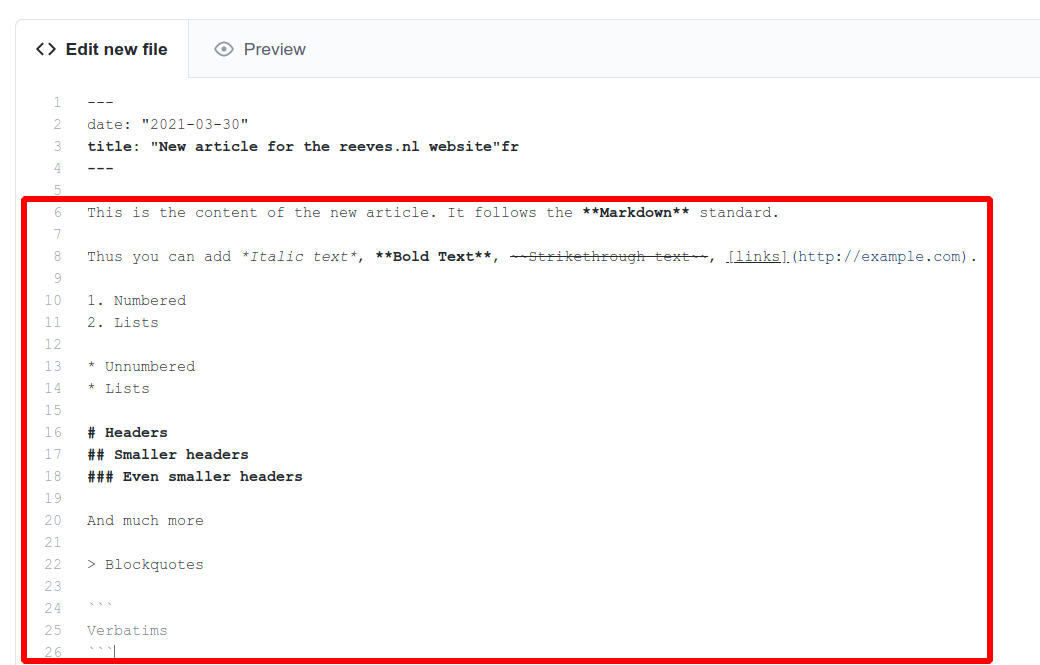
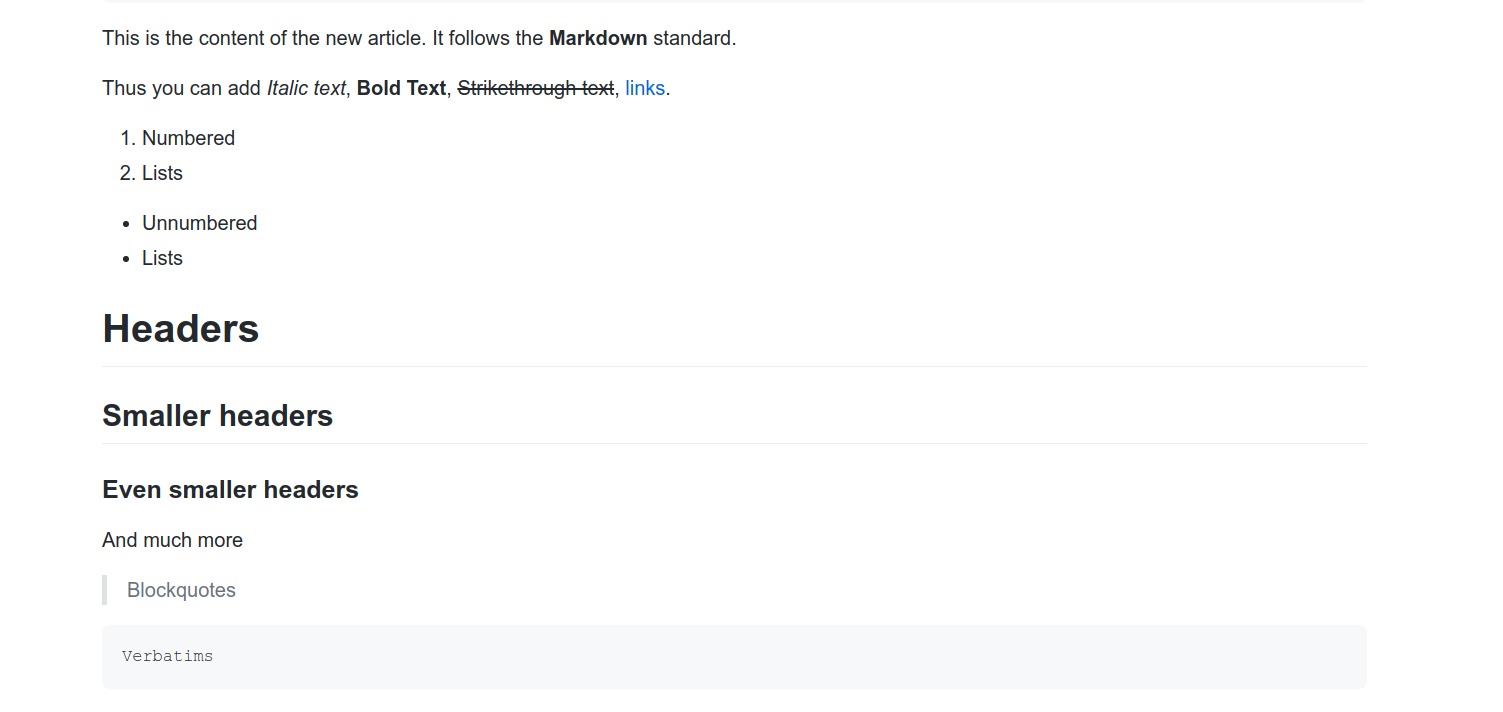
Now we come to the Markdown editing view.
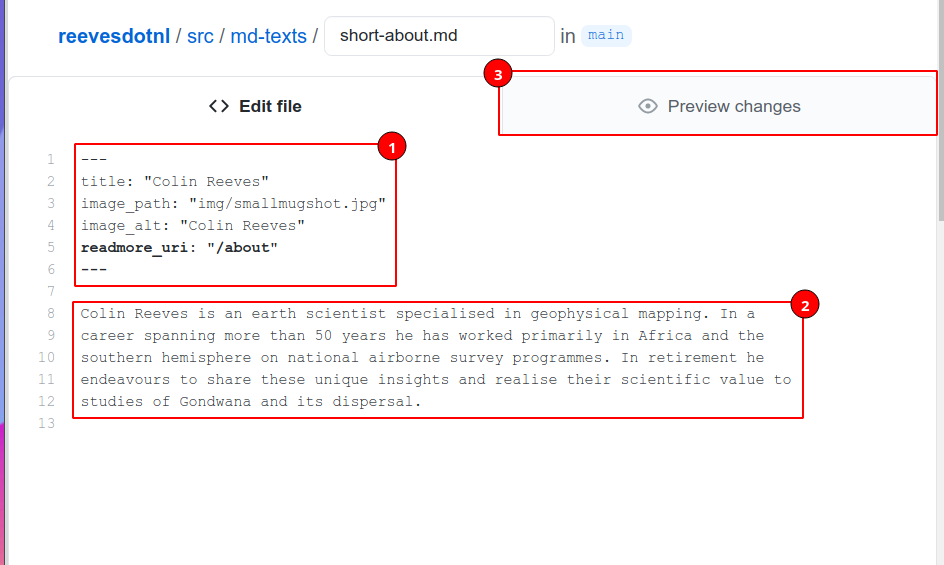
- Contains some metadata about the short about and should remain untouched.
- The actual text displayed on the page according to the Markdown standard.
- A basic preview of how it is going to look. This is not an exact mirror of the final webpage, but it can serve as a form of indication.
After we are done editing we scroll down to the Commit Changes section.
- Enter an appropriate title e.g.
Edited small about - Make sure the
Commit directly to the main branchis checked. - Click the
Commit Changesbutton.
Adjusting Latest update
In order to update the latest update. We need to direct towards the src/md-texts
folder.
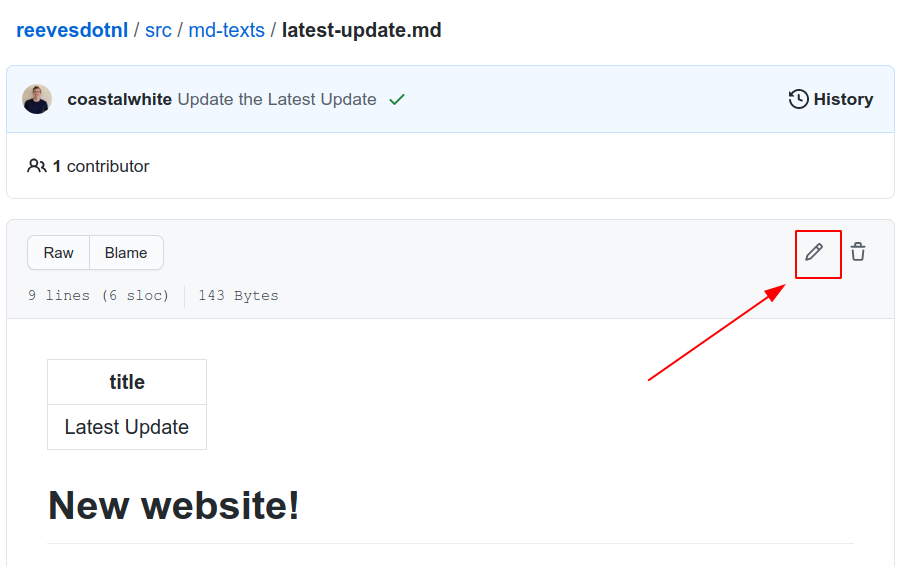
Here we will see the latest-update.md file. Open that file.
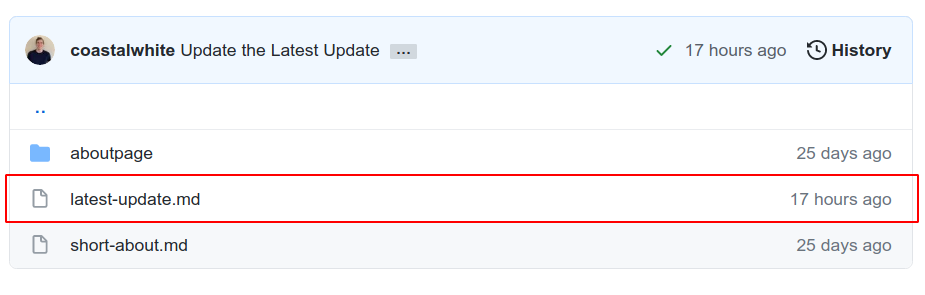
Then we click the edit icon in the upperright corner.
Now we come to the Markdown editing view.
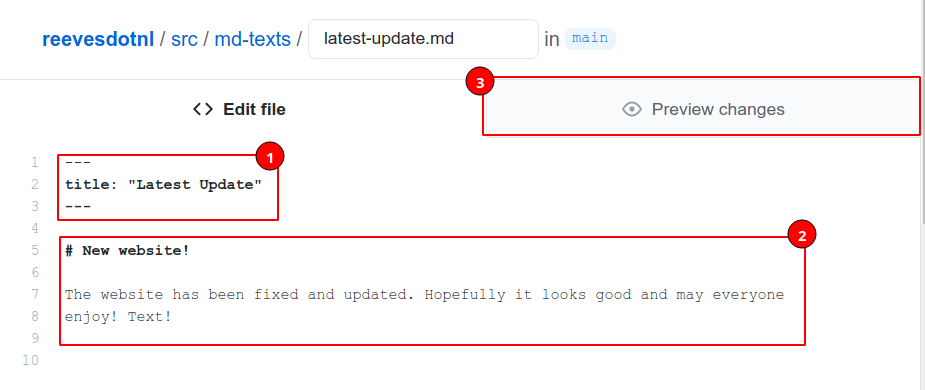
- Contains some metadata about the short about and should remain untouched.
- The actual text displayed on the page according to the Markdown standard.
- A basic preview of how it is going to look. This is not an exact mirror of the final webpage, but it can serve as a form of indication.
After we are done editing we scroll down to the Commit Changes section.
- Enter an appropriate title e.g.
Edited latest update - Make sure the
Commit directly to the main branchis checked. - Click the
Commit Changesbutton.
Adjusting mugshot
Have a look at the adjusting the main page animation for a video explanation. This process is
extremely similar, only difference being the smallmugshot.jpg instead of the
homepage.gif.
In order to update the small mugshot image we would:
- Delete the old
smallmugshot.jpgin thesrc/assets/imgfolder. - Upload a new
smallmugshot.jpginto thesrc/assets/imgfolder.
Deleting the old image
In order to delete the old smallmugshot.jpg, we would go the main
page. Direct into the src/assets/img folder.
Then we direct towards to the smallmugshot.jpg file.
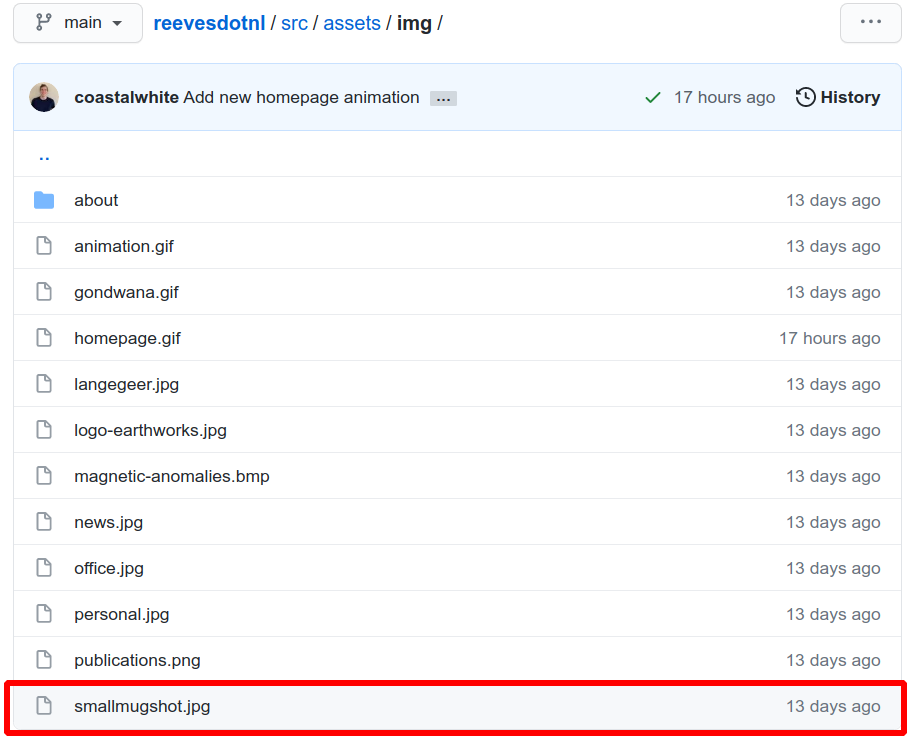
We click the delete icon in the upper right corner.
We will be redirected to a page where we can fill out the following form.
- Enter an appropriate title e.g.
Delete small mugshot - Make sure the
Commit directly to the main branchis checked. - Click the
Commit Changesbutton.
Now the old image is deleted.
Uploading a new image
In order to upload a new image we again go to the src/assets/img folder.
Now we are going to click Add File. This will open a dropdown menu in which we
are going to click Upload Files.
This will open a new page, where we can click the choose your files link to
open the file explorer and upload a smallmugshot.jpg.
IMPORTANT NOTE: make sure the file is actually called smallmugshot.jpg otherwise
it will not work
Then we again come to the Commit Changes section.
- Enter an appropriate title e.g.
New small mugshot - Make sure the
Commit directly to the main branchis checked. - Click the
Commit Changesbutton.
Note: The demo page may take a while to properly update after this. It may first fail to load the image. After around 10 minutes this should be fixed however.
Editing the Gondwana page
Adjusting main animation
On the page on how to adjust the homepage
animation is a video. This process is
parallel to that process just with the gondwana.gif instead of homepage.gif.
In order to update the gondwana page animation we would:
- Delete the old
gondwana.gifin thesrc/assets/imgfolder. - Upload a new
gondwana.gifinto thesrc/assets/imgfolder.
Deleting the old animation
In order to delete the old gondwana.gif, we would go the main
page. Direct into the src/assets/img folder.


Then we direct towards to the gondwana.gif file.

We click the delete icon in the upper right corner.

We will be redirected to a page where we can fill out the following form.

- Enter an appropriate title e.g.
Delete gondwana animation - Make sure the
Commit directly to the main branchis checked. - Click the
Commit Changesbutton.
Now the old animation is deleted.
Uploading a new animation
In order to upload a new animation we again go to the src/assets/img folder.
Now we are going to click Add File. This will open a dropdown menu in which we
are going to click Upload Files.


This will open a new page, where we can click the choose your files link to
open the file explorer and upload a gondwana.gif.
IMPORTANT NOTE: make sure the file is actually called gondwana.gif otherwise
it will not work

Then we again come to the Commit Changes section.
- Enter an appropriate title e.g.
New gondwana animation - Make sure the
Commit directly to the main branchis checked. - Click the
Commit Changesbutton.
Note: The demo page may take a while to properly update after this. It may first fail to load the animation. After around 10 minutes this should be fixed however.
Adjusting main text
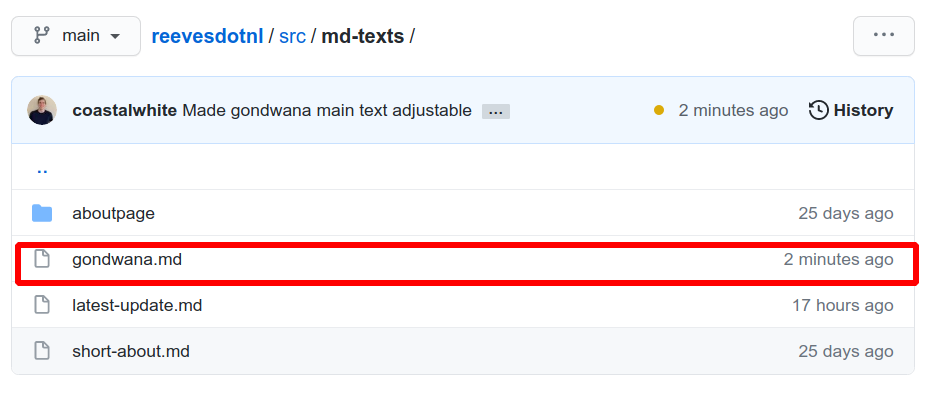
In order to update the gondwana main text. We need to direct towards the src/md-texts
folder.

Here we will see the gondwana.md file. Open that file.
Then we click the edit icon in the upperright corner.
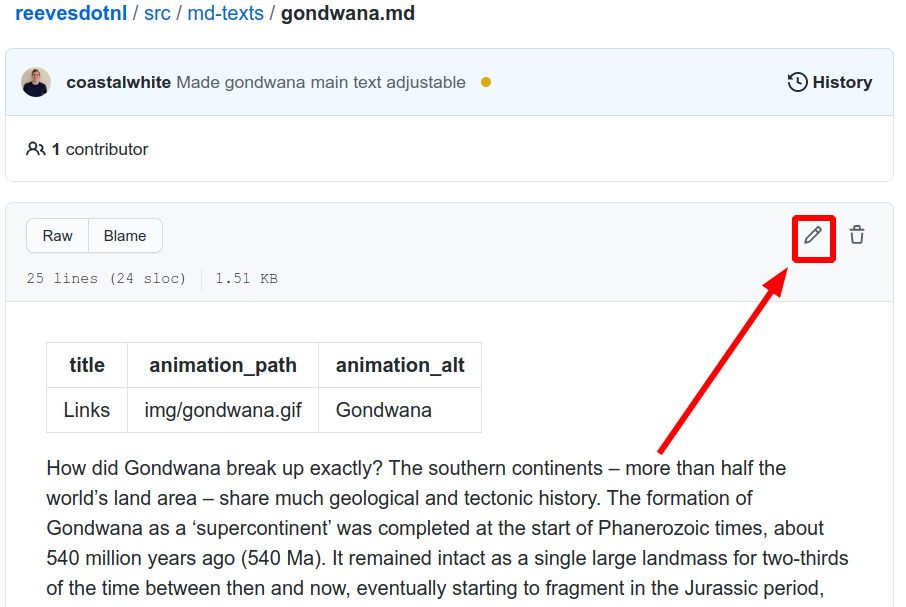
Now we come to the Markdown editing view.
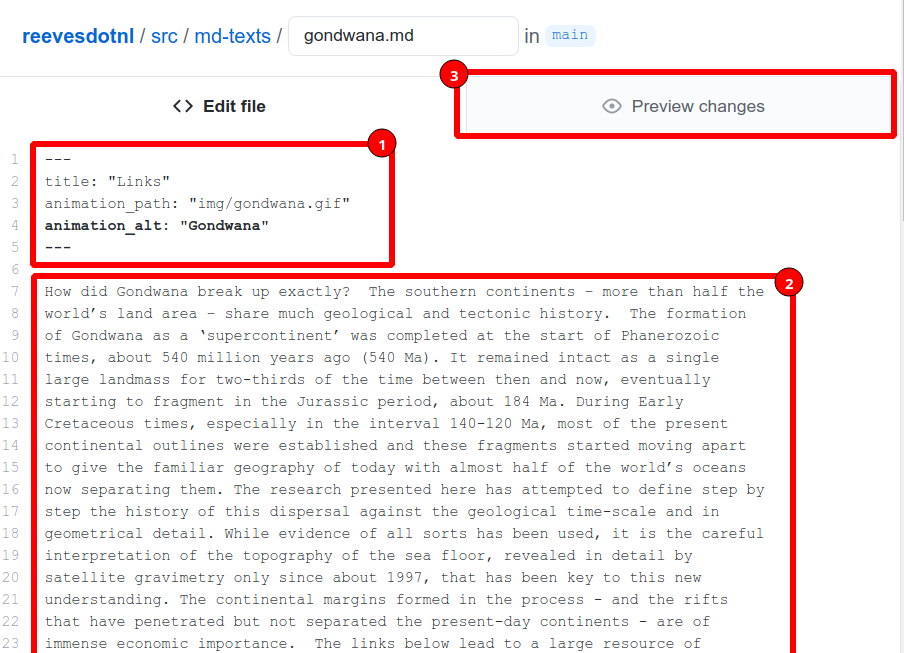
- Contains some metadata about the short about and should remain untouched.
- The actual text displayed on the page according to the Markdown standard.
- A basic preview of how it is going to look. This is not an exact mirror of the final webpage, but it can serve as a form of indication.
After we are done editing we scroll down to the Commit Changes section.
- Enter an appropriate title e.g.
Edited gondwana text - Make sure the
Commit directly to the main branchis checked. - Click the
Commit Changesbutton.
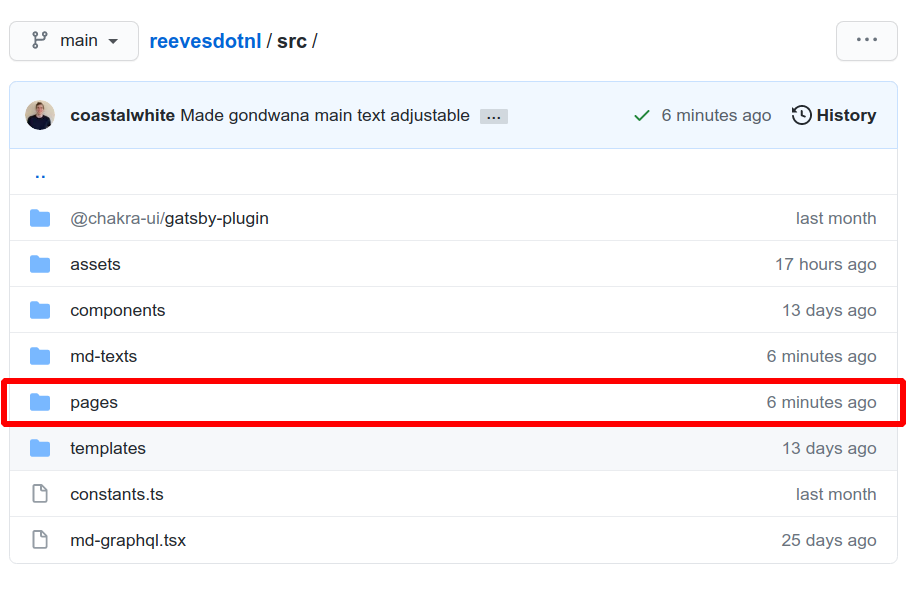
Adjusting articles
In order to update an gondwana article. We need to direct towards the
src/pages/gondwana folder.
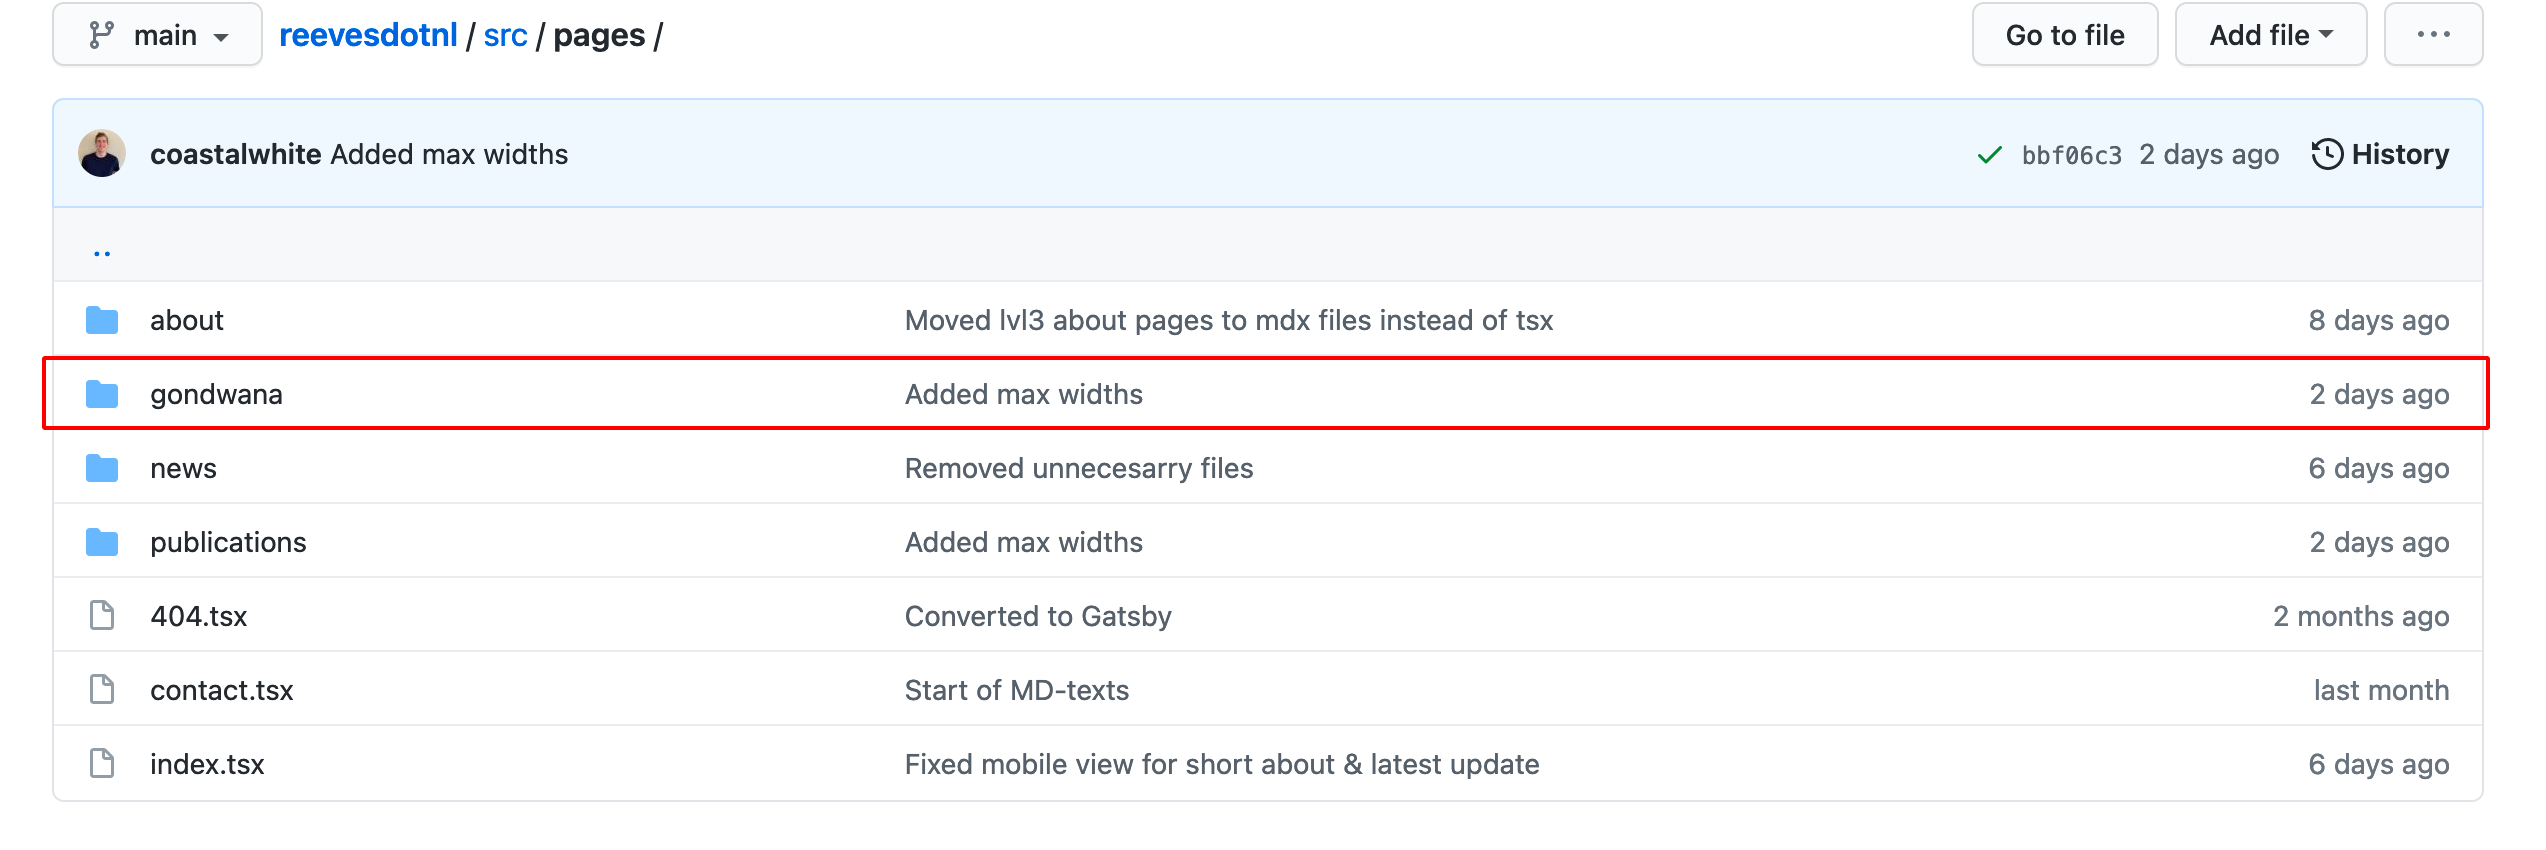
Here we will see the all the articles with the *.mdx file format, with *
being the names (also the * in the URL reeves.nl/gondwana/*) of an article.
Open that the file that matches the article you want to adjust.
Then we click the edit icon in the upperright corner.
Now we come to the Markdown editing view.
- Contains some metadata about the article. The
titlebeing the header above the article and thedate(in Year-Mo-Da format) being the editing date. These can be adjusted accordingly. - The actual text displayed on the page according to the Markdown standard.
- A basic preview of how it is going to look. This is not an exact mirror of the final webpage, but it can serve as a form of indication.
After we are done editing we scroll down to the Commit Changes section.
- Enter an appropriate title e.g.
Edited article - Make sure the
Commit directly to the main branchis checked. - Click the
Commit Changesbutton.
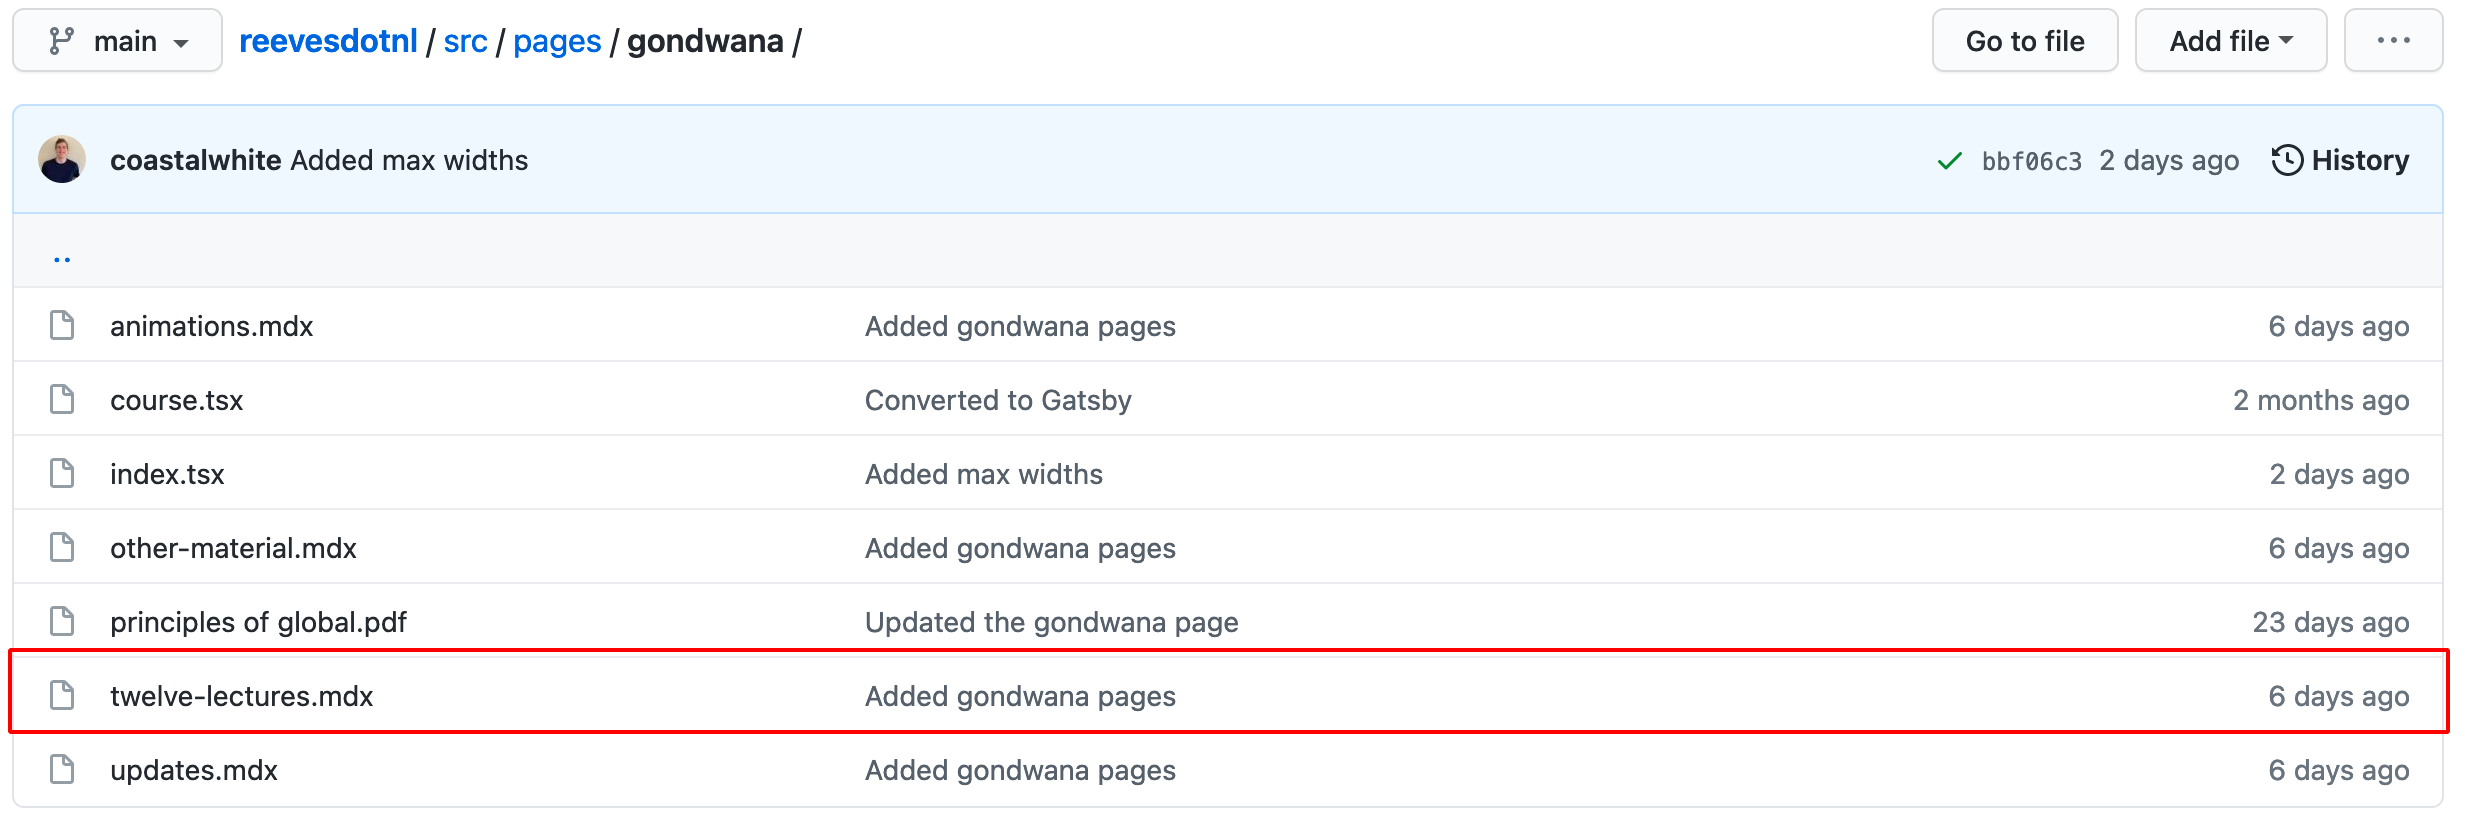
Adjusting/Adding new animations
In order to update the gondwana animations. We need to direct towards the
src/pages/gondwana folder.
Here we will see the all the articles with the *.mdx file format, with *
being the names (also the * in the URL reeves.nl/gondwana/*) of an article.
Open that the file that matches the article you want to adjust. Here we are
going to adjust the animations article.
Then we click the edit icon in the upperright corner.

Now we come to the Markdown editing view.

Here you can see a list of animations.
You can either directly display them by following the Adding
images/animations guide, or you can follow the same guide
and add a link to the image/animation with the [Description of Animation](./assets/animation-name.png) link syntax as specified in the
Markdown guide.
After we are done editing we scroll down to the Commit Changes section.
- Enter an appropriate title e.g.
Edited animations - Make sure the
Commit directly to the main branchis checked. - Click the
Commit Changesbutton.
Editing the News
Adding a news article
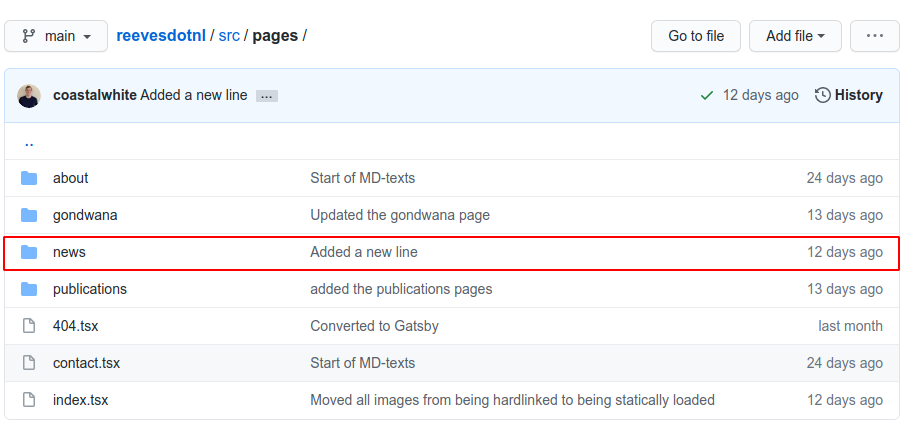
To add a new article we must go to src/pages/news folder.


Now we click the Add file button in the upperright corner. Followed by the
Create new file button in the dropdown menu.
Now we come to a new page, where we first must add a name for our file. The naming here is as follows:
- Only lowercase words, divided with
- - Ending on the extension
.mdx
So an example would be an article called Ducks are Beautiful Animals, could be
called ducks-beautiful-animals.mdx.

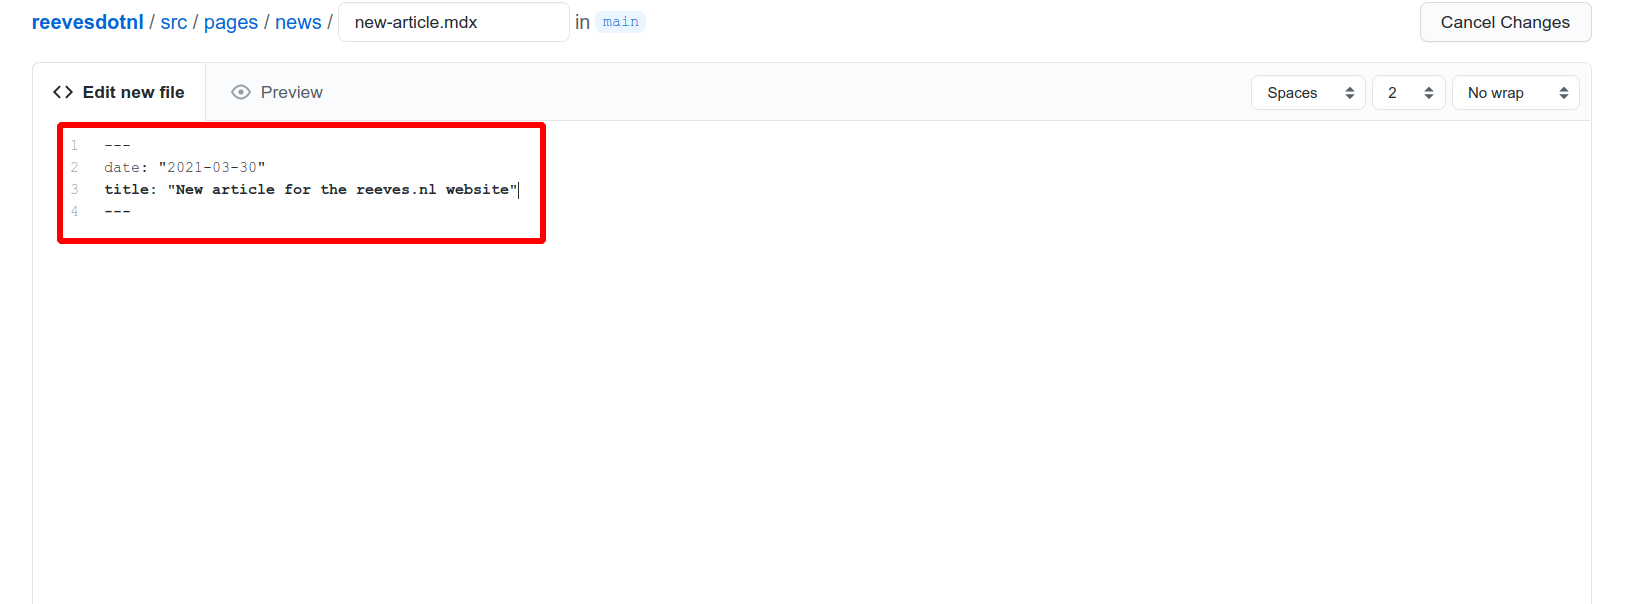
Now we need to add some metadata about the article. What is the date at which it is published, and what is the title of the article.
That all goes in here. This is started and ended with a line of ---.
For the date we would add a line date: "YYYY-MM-DD" with YYYY being the year, MM
being the month and DD being the day. For the title we would add a line:
title: "Ducks are Beautiful Animals" where you can replace everything
between the quotes with your own title.
Afterwards we can add our article in the markdown format. To add images take a look here.

This would equate to:

Now we scroll down to the Commit Changes section.

- Enter an appropriate title e.g.
Added news article - Make sure the
Commit directly to the main branchis checked. - Click the
Commit Changesbutton.
The article should now be added.
Adding a banner image
To add a banner image, we can navigate to the src/pages/news/banners folder.
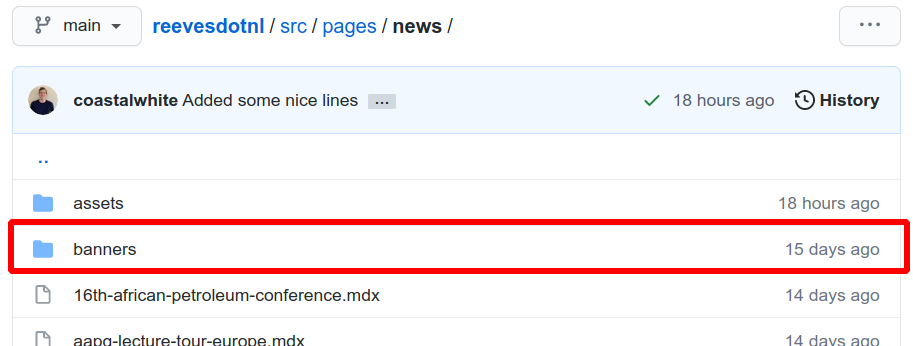
We click the Add file button (shown in the following figure).

A small menu will pop up and we will click the Upload files button.

A new page will show up where we can click the choose your files. This will
open a file explorer where you can direct it towards the banner image.
Alternatively, you could drag the files from the source
into this box, which should also add them.
IMPORTANT NOTE: Make sure your banner image has the same base filename as your article. E.g. if your article is called
ducks-beautiful-animals.mdxthen your banner image should be calledducks-beautiful-animals.*with the*being the extension of the image (png,jpg,gif,bmp, etc.). This should be done before uploading the image.
All uploaded images will appear under the box (as can be seen below).

When we have added all the images we would like to upload we can move onto the next step.
Verifying the uploaded files
If we have added all the images we want to add we can scroll down the page to see the following box.

In 1 we want to add a description of what we just added. I just added a banner
image so I would write something like Added banner image. This is not very
important, but in the long run will help with keeping track of what you did.
We want to make sure 2 is checked.
After 1 and 2 are done, we can click the Commit Changes button.
Adjusting a news article
In order to update an news article. We need to direct towards the
src/pages/news folder.
Here we will see the all the articles with the *.mdx file format, with *
being the names (also the * in the URL reeves.nl/news/*) of an article.
Open that the file that matches the article you want to adjust. Here we are
going to adjust the fit-southern-continents article.
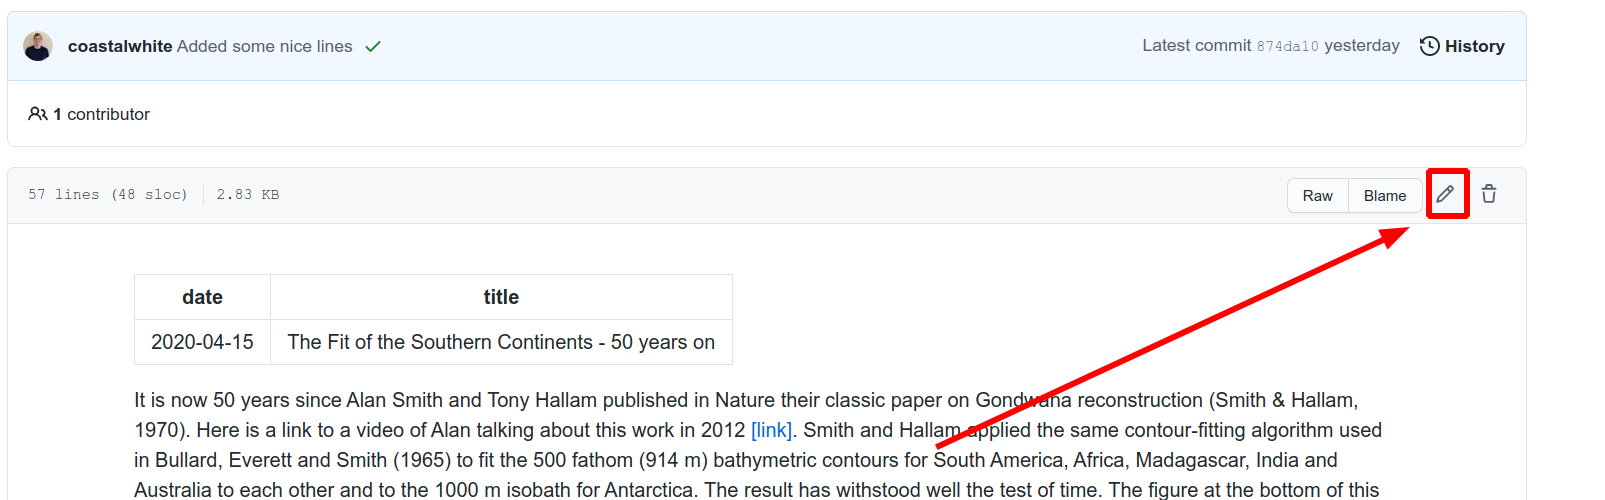
Then we click the edit icon in the upperright corner.

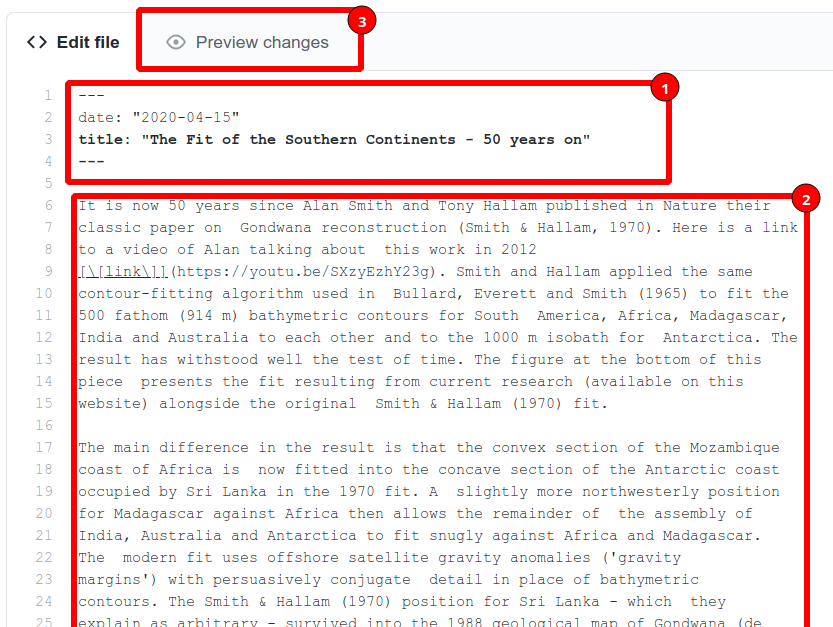
Now we come to the Markdown editing view.

- Contains some metadata about the article. The
titlebeing the header above the article and thedate(in Year-Mo-Da format) being the editing date. These can be adjusted accordingly. - The actual text displayed on the page according to the Markdown standard.
- A basic preview of how it is going to look. This is not an exact mirror of the final webpage, but it can serve as a form of indication.
After we are done editing we scroll down to the Commit Changes section.
- Enter an appropriate title e.g.
Edited article - Make sure the
Commit directly to the main branchis checked. - Click the
Commit Changesbutton.
Editing the About
Editing Personal Page
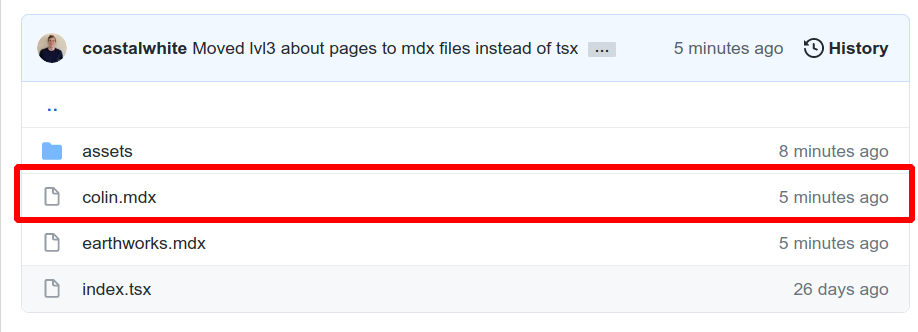
In order to update an news article. We need to direct towards the
src/pages/about folder.


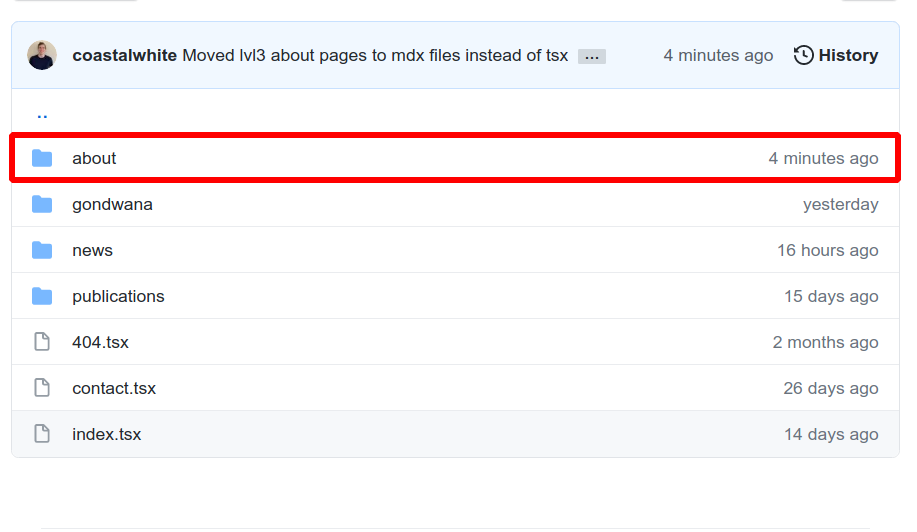
Here we see the colin.mdx page, that is the page we are going to adjust.
Then we click the edit icon in the upperright corner.
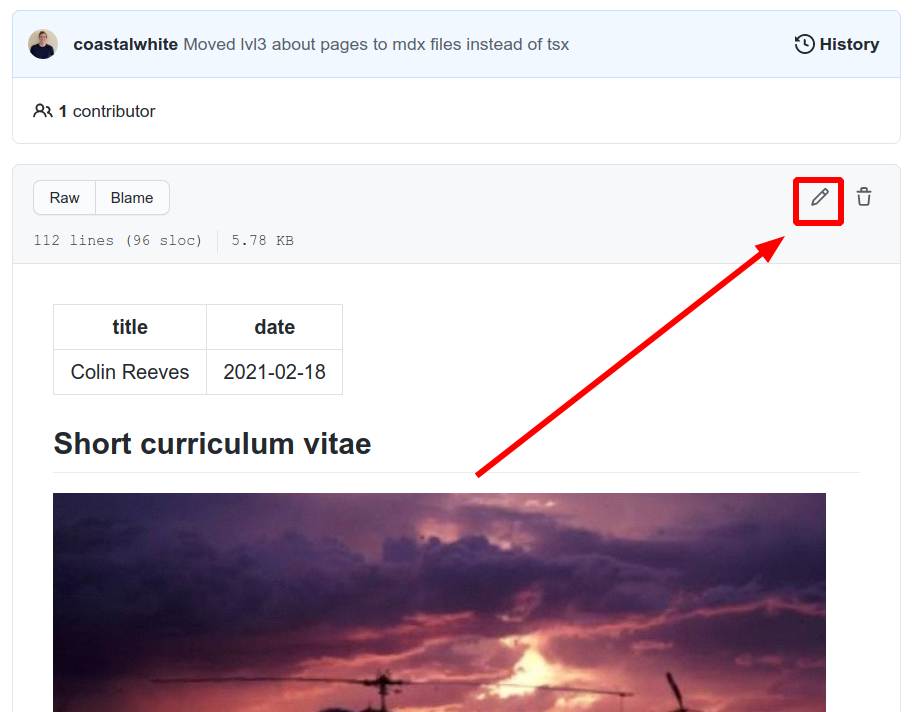
Now we come to the Markdown editing view.
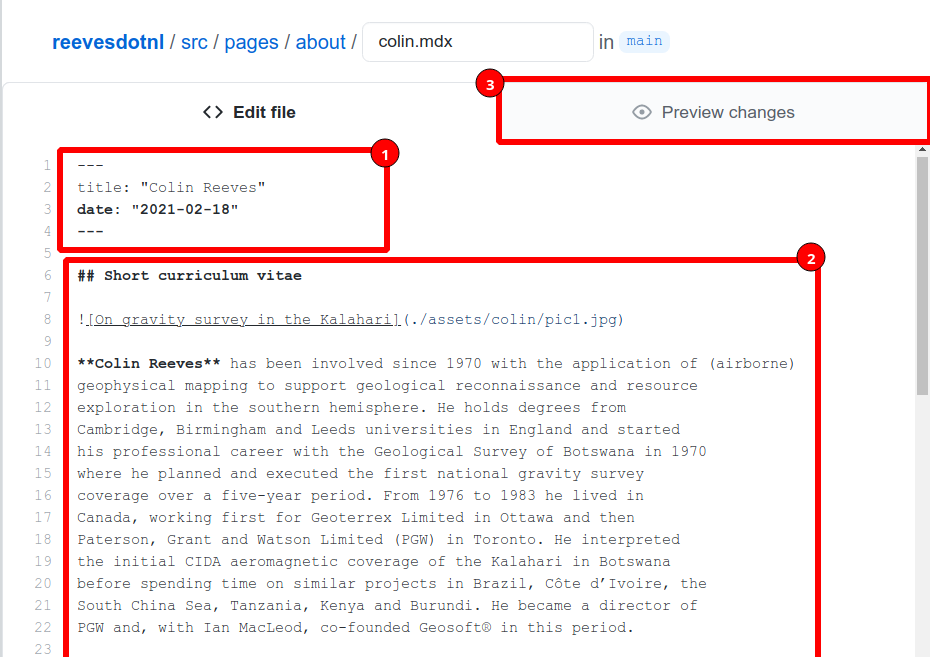
- Contains some metadata about the article. The
titlebeing the header above the article and thedate(in Year-Mo-Da format) being the editing date. These can be adjusted accordingly. - The actual text displayed on the page according to the Markdown standard.
- A basic preview of how it is going to look. This is not an exact mirror of the final webpage, but it can serve as a form of indication.
After we are done editing we scroll down to the Commit Changes section.

- Enter an appropriate title e.g.
Edited colin about page - Make sure the
Commit directly to the main branchis checked. - Click the
Commit Changesbutton.
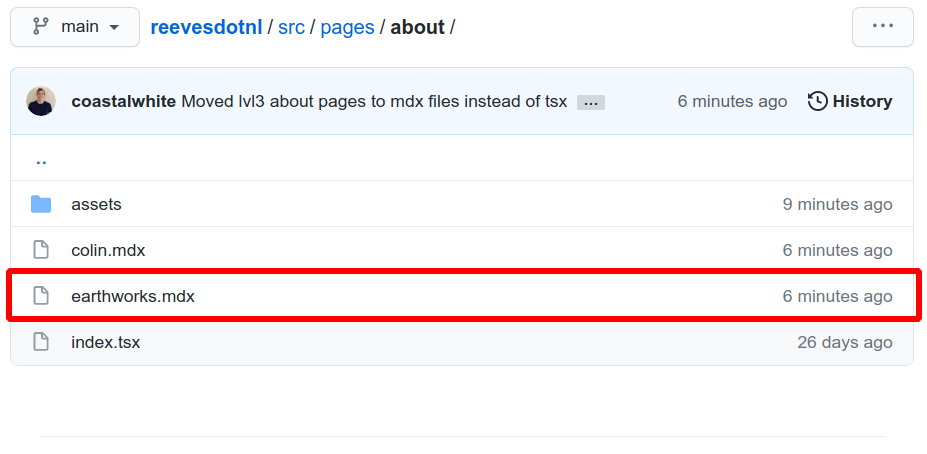
Editing Earthworks Page
In order to update an news article. We need to direct towards the
src/pages/about folder.
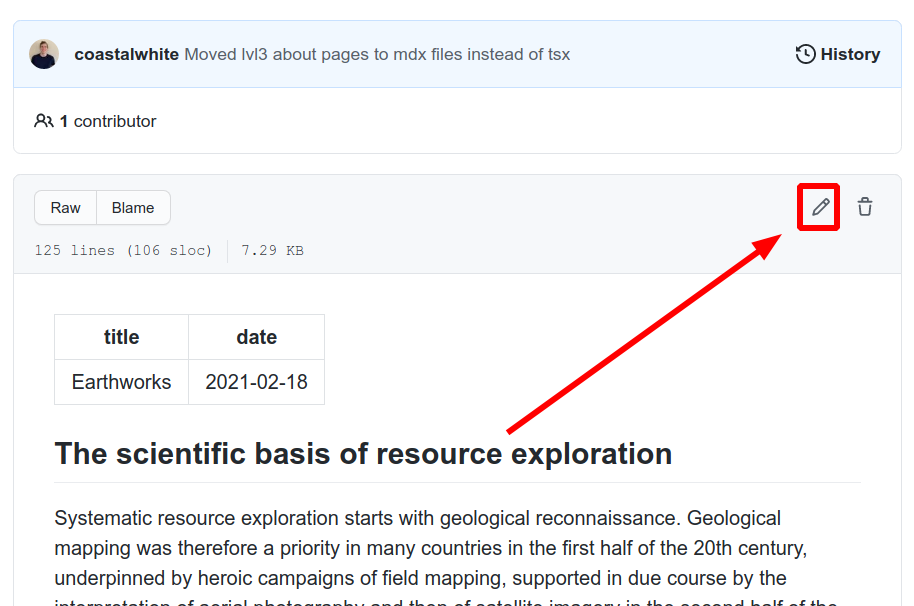
Here we see the earthworks.mdx page, that is the page we are going to adjust.
Then we click the edit icon in the upperright corner.
Now we come to the Markdown editing view.
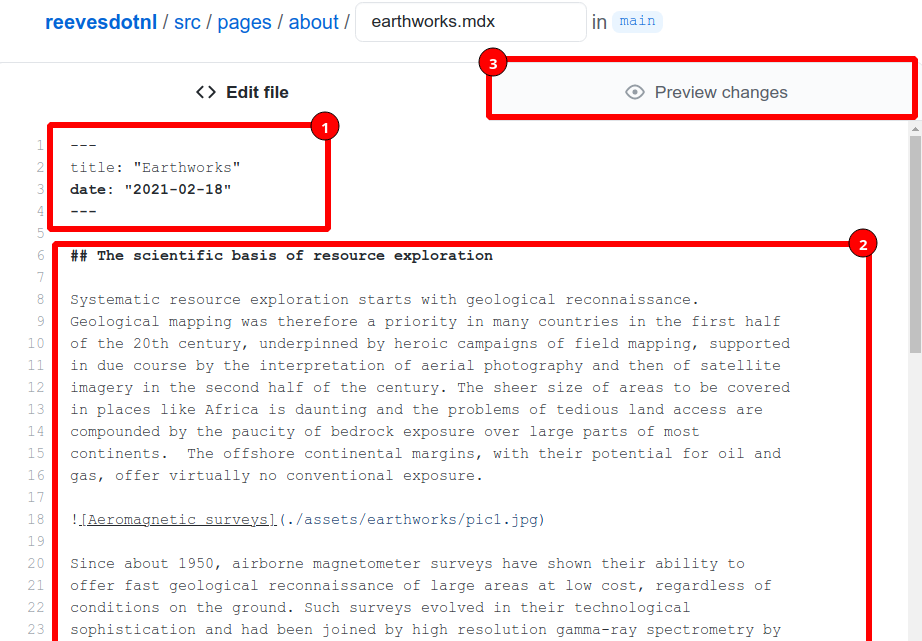
- Contains some metadata about the article. The
titlebeing the header above the article and thedate(in Year-Mo-Da format) being the editing date. These can be adjusted accordingly. - The actual text displayed on the page according to the Markdown standard.
- A basic preview of how it is going to look. This is not an exact mirror of the final webpage, but it can serve as a form of indication.
After we are done editing we scroll down to the Commit Changes section.
- Enter an appropriate title e.g.
Edited earthworks about page - Make sure the
Commit directly to the main branchis checked. - Click the
Commit Changesbutton.
Something went wrong, what now?
Reverting a change
Here is a video on how to do it, if something big went wrong I suggest contacting Gijs:
Page looks all weird
Here is a video on how to do it, if something big went wrong I suggest contacting Gijs:
Images aren't showing up
Here is a video on how to do it, if something big went wrong I suggest contacting Gijs:
Contacting Gijs
You can contact me at my email: